
THE EDTECH JOURNEY SO FAR: MAET and CEP810
Posted on Aug 16, 2018 Leave a Comment
 This year has been a blur. It has been a banner year of transformation and challenge, and the year isn’t even over. In March of 2018, I started a trajectory of new thinking inspired by several PD experiences. I attended my first EdTech conference, a small gathering called Cue in Palm Springs. I also served on a WASC accreditation team the following week evaluating a school that was trying to integrate technology into their classes with mixed results.
When I returned to the classroom the following week, I had been inspired to return to school to find answers and receive more comprehensive training in Educational Technology. A random website listing the top schools for online EdTech programs led me to the Master of Arts in Educational Technology (MAET) at Michigan State University. I went for it and applied.
The questions and inspiration that I experienced at Cue and on WASC continued while taking the first class in this program—CEP810: Teaching for Understanding with Technology.
During this class, aspects of my practice as a teacher were confirmed and others were challenged. Having spent the last 6 years teaching in an iPad 1:1 school, I had stumbled upon problems and breakthroughs—both original to myself but also inspired by others. As a whole, this course consistently asked me to develop practical skills and tools that I had never considered necessary. In particular, developing a PLN (Professional Learning Network) and digital workflow inspired by the GTD (Get Things Done) model will be transformative. And in particular, the PLN online learning activity in which I took on Photoshop these last 7 weeks has already paid dividends. I’ve created some great graphics that have inspired other peer teachers and has encouraged the creativity of several students.
As a whole, my work has already begun to change. I see myself becoming more creative, lecturing less, facilitating creative assignments, designing learning opportunities from PLNs that students create for themselves, and generally guiding them into becoming creators as an expression of their learning.
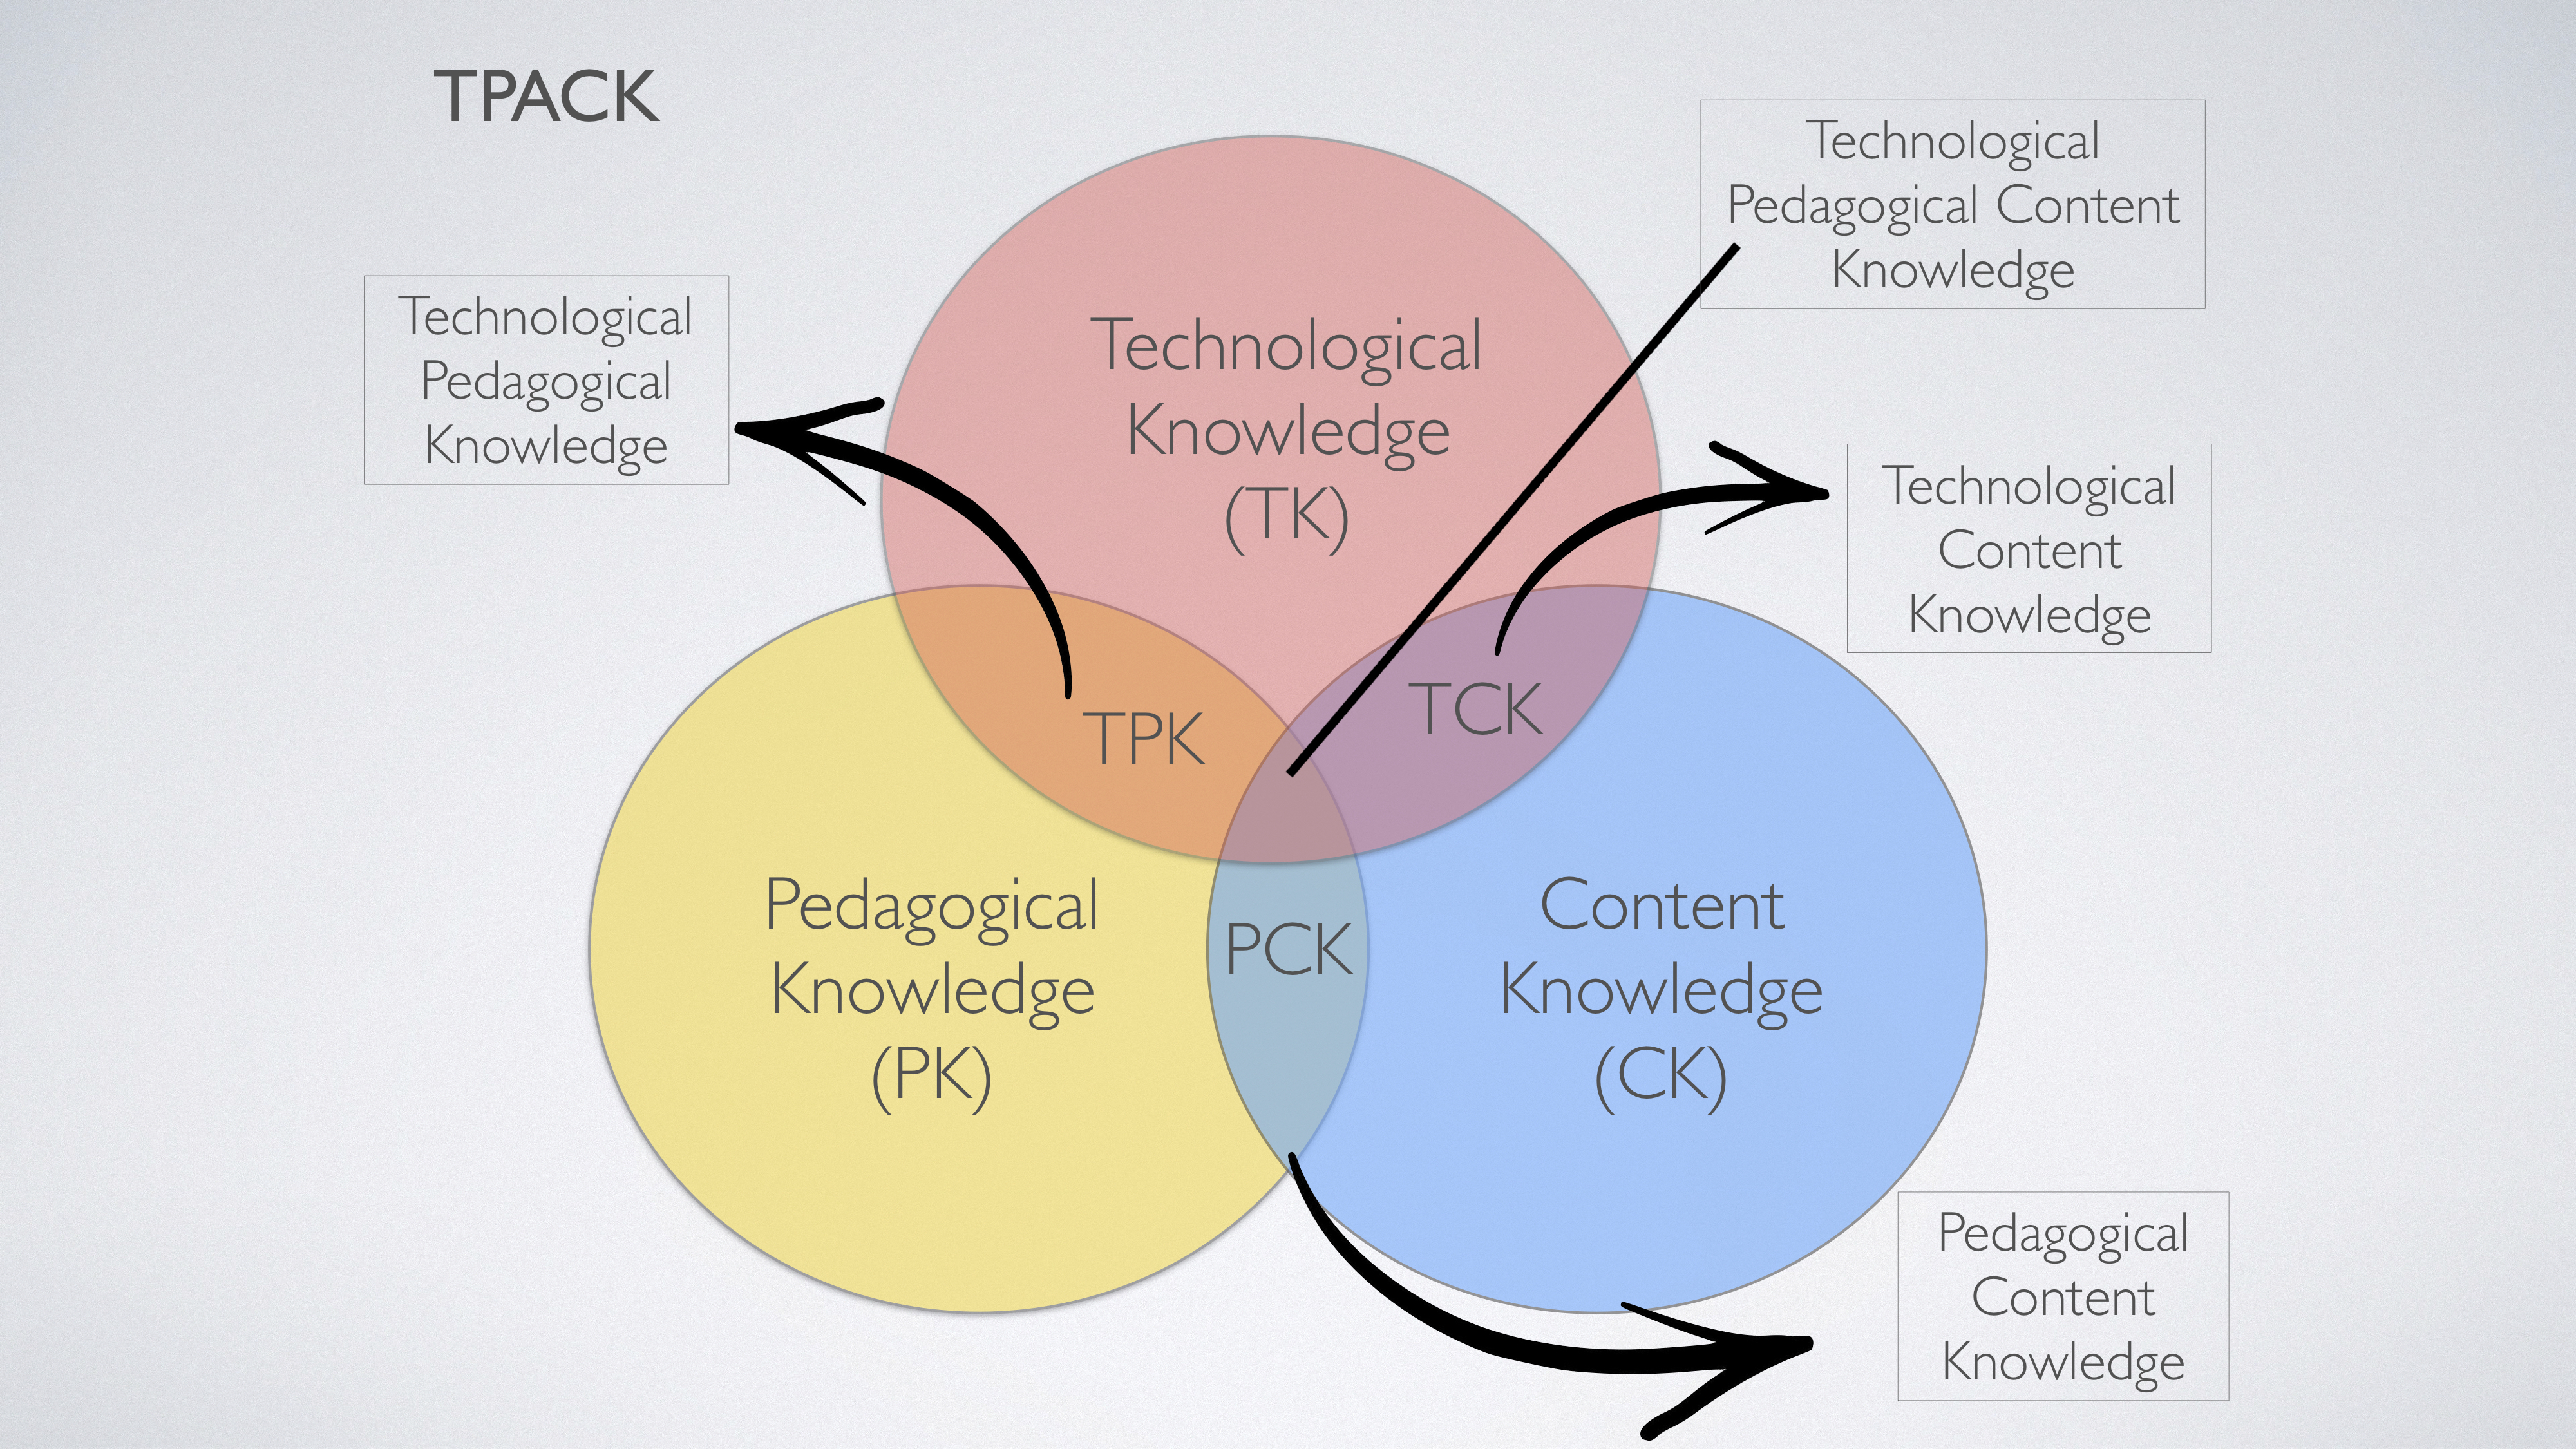
On a practical note, I teach four different subjects. I have “ditched the textbook” for one of the classes, inspired by a member of my new PLN Matt Miller. I am excited about the trajectory my approach as a teacher is taking. I am shooting for becoming a TPACK teacher, striking that bullseye intersection of Technology, Pedagogy, and Content.
But I am not without concerns and questions.
The classic question looming in my mind is how am I going to get through all the content of my class. I am sure all teachers feel this way, but most history classes in High School end shortly after WWII. Getting into the 90s? The teacher that gets through that decade in a meaningful way is a unicorn. Indeed, I am not talking about the teacher that has their students fly-by-the-seat-of-their-pants, one-decade-a-day-to-get-from-1950-to-2000 kind of way, but useful instruction. That teacher is a superhero. How do I go more in-depth with all this creativity and exploration and still cover what I need to include? I’m not sure yet.
Also, while I have been inspired and several creative activities have already emerged, I am concerned that all this inspiration will dry up. I fear that I will be super creative at the beginning of the year and then just slip into what is familiar when things get tough half-way through the year.
Much like this bicycle video that went viral a few years ago, this last year—and really several years—has felt like learning to ride a “backwards bike.”
But I am ready to jump in with both feet and transform how learning is done in my classroom and at my school.
Thank you CEP810 and MAET, I know this is an excellent start to something beautiful!
The original image above is from Mark Sebastian.
COOKING WITH TPACK
Posted on Aug 14, 2018 Leave a Comment
Few technological tools were designed specifically for education. Indeed, most tools were created for entertainment or the business world. The task of the teacher is to use the tools available to them to help improve student learning. The teacher in today’s classroom needs to be creative in repurposing existing technologies to instruct better and enhance student learning. Kereluik, Mishra, & Koehler (2011) argue that “Teachers must embrace the role of becoming designers of curriculum, choosing technology that is appropriate for the context to be covered and their pedagogical approach (p.13).” This design is a creative one, seeing applications for learning in tools that were created for entertainment and business.
This process is part of a larger instructional design called TPACK. This golden zone of teaching is the intersection of Technological Knowledge, Pedagogical Knowledge, and Content Knowledge. Where these three intersect is ideal for instruction and student learning.
In light of all this theory, my graduate class in the Educational Technology program at MSU and I undertook the Quickfire Challenge. A family member chose a plate, a bowl, and a kitchen utensil without knowing the task to which the challenger is assigned. Through a random draw, a daily kitchen task is assigned to complete with the tools provided. In my case, I was given a teacup plate, a small bowl, and a sauce brush. I needed to repurpose these tools to slice cheddar cheese.
After a few seconds of repurposing the handle of the brush to chunk the cheese, I realized that my thinking was fixed in using the plate and bowl as “holding” tools and the brush as an “action” tool. Once I realized my implicit boxed-in thinking, I was able to think beyond the usual purpose and parameters of the tools in front of me. I shifted gears and used the plate as a cutting tool, abandoning the sauce brush.
While a fun activity, the Quickfire Challenge served a deeper purpose. My instruction is often like that block of cheese and the tools before me. Indeed, the individual learning needs of my students are much like that cheese. I knew what needed to happen. I had the outcome in mind—slice cheese. I wanted a knife or something with a sharp or thin edge with which to cut. Recognizing these outcomes and needs, I was able to adapt and repurpose my existing tools.
Student learning is more important than the tools with which we teach. Adapting our practices as teachers to better reach students is the way forward. The available tools around us, whether smart tablets or social media, need to be creatively repurposed to reach our students.
Designing learning experiences for students in this vein can seem overwhelming, of course. This is why having a robust PLN (Professional Learning Network) is vital. Surrounding yourself with people who are experimenting and trying new things that can inspire you as a teacher is more relevant now than ever before.
References
Kereluik, K., Mishra, P. & Koehler, M.J. (2011). On learning to subvert signs: Literacy, technology and the TPACK framework. The California Reader, 44(2), 12-18.
Mishra, P., & Koehler, M. J. (2006). Technological pedagogical content knowledge: A framework for teacher knowledge. Teachers College Record, 108(6), 1017-1054.
6 REASONS WHY SOCIAL SCIENCE CLASSES NEED TO “MAKE”
Posted on Aug 12, 2018 Leave a Comment
 Making is deep in our DNA. Indeed, is not the process of making, playing, and improving something how we naturally learn? My first encounter with a hammer and nails, a rope and make-shift pulley system came to us while creating a fort high in an olive tree grove next to our house. Through trial and error, we created a beacon of 80s childhood glory high in the treetops. This is not a unique story. Humans make.
Should not our classes emphasize the same?
Maker Education stems (no pun intended) from the Constructivist theory of learning. Technically called Constructionism, Sheridan, Halverson, Litts, Brahms, Jacobs-Priebe, & Owens (2014) argue that this school of thought “focus[es] explicitly on how the making of external artifacts supports learners’ conceptual understanding” (p. 507). Learning is best produced by making things. Therefore, making is the process of play with a purpose. Whether designing, tinkering, or trying to solve a problem, making and makerspaces have begun emerging in schools to reinforce deeper learning.
While STEM and creating makerspace dedicated to engineering is all the rage in schools across the country, what role does making play in the Social Sciences? History, Government, and Psychology tend to focus on lecture and student note-taking. However, creating and making is as vital to the Social Sciences as it is to the Sciences.
The application of the Historical Thinking Skills to the High School classroom is a recent development. Emphasizing source analysis, periodization, continuity and change, among others, has challenged Social Science teachers to go deeper with their students. Beyond the rote memorization, matching keyword term quizzes, and silent textbook reading lay the promise of a better way. Making, project/problem-based learning, and inquiry-based learning are the future of the Social Sciences.
In the infograph below, I make a case for six reasons why Social Science classes ought to embrace a making culture, and through it project/problem-based learning and inquiry-based learning.
What is not included are concrete ideas on how to execute Maker education in the Social Science classroom. A followup infograph and separate post will be needed to tackle that topic.
But to briefly speak to that, making can look like an open-ended project where students can attempt to recreate some historical artifact, create an ebook for other students, or create instructional remix videos on some historical topic. Indeed, in 2017, a few of my students created “Top 10” “Watch Mojo” style education videos posted to Youtube. These are some answers to the how question. But first is the why.
I only identified 6 reasons why a social science class should become a maker class. There are others, no doubt.
What other “whys” do you see that I missed?
For more inspiration on Maker Education, Making, and Makerspaces follow #MakerED

REFERENCES
Bransford, J.D., Brown, A.L., & Cocking, R.R. (2000). How people learn: Brain, mind, experience and school. National Academies Press. Retrieved from http://www.nap.edu/openbook.php?isbn=0309070368.
Halverson, E.R. & Sheridan, K. (2014). The maker movement in education. Harvard Educational Review, 84(4), 495-465.
O’Donnell, A. (2012). Constructivism. In APA Educational Psychology Handbook: Vol. 1. Theories, Constructs, and Critical Issues. K. R. Harris, S. Graham, and T. Urdan (Editors-in-Chief). Washington, DC: American Psychological Association. DOI: 10.1037/13273-003.
Sheridan, K. Halverson, E.R., Litts, B.K., Brahms, L, Jacobs-Priebe, L., & Owens, T. (2014) Learning in the making: A comparative case-study of three maker spaces. Harvard Educational Review, 84(4), 505-565.
The infograph was created using Piktochart. All images used were either native to the software or were found using Pixabay.
Vetting “Fake News” with Flipboard and Flipgrid
Posted on Aug 5, 2018 Leave a Comment

 21st-century technology demands a 21st-century approach to teaching and learning. The ways things worked in the past will no longer work. It is not so much that students have changed (as the disgruntled teacher down the hall complains. Our society has transformed thanks to the internet and compact computing devices, like smartphones. How we consume information has changed. Memorized raw information is less important when one can just google it. Learning to think, reason, problem-solve, and create in constructive ways is paramount. To that end, I have designed a lesson plan for students whom will process and inquire about the all-too-common but potent phrase “Fake News.”
This lesson provides Grades 9-12 with the opportunity to examine and explore, through both guided and independent inquiry, the complex web of “reliable information” as they become student journalists for the year. Through practicing the Historical Thinking Skills and learning the relevant writing, reading, and speaking standards, students will demonstrate their understanding through the creation of both a news magazine for peer learning and engagement by using the app Flipboard. Students will also respond to news articles using Flipgrid, practicing their oracy skills while respectfully engaging in dialogue. According to Hobbs (2011), there are “five communication competencies [that serve as] fundamental literacy practices that are now part of learning across all subject areas” (p.12). These five competencies are access, analysis, creation, reflection, and action.
Through the “RESEARCH AND REGIONAL NEWS” lesson, students will (1) ACCESS, and in this case, find appropriate resources and use these resources as tools for learning. Students will conduct this research, with the assistance of their teacher, and publish these news articles from their selected global regions to their Flipboard—which will be shared with their peers and the broader community of the school. Furthermore, students will (2) ANALYZE, and in this case, critically think and evaluate the perspective of the authors and news sources and examine the potential effects of the message. Students will post the articles they discover with an analysis of the validity, biases, and implications of the story. Continuing, students will (3) CREATE, and in this case, students will compose and curate content by creating and publishing their own magazine. Also, students will (4) REFLECT, and in this case, students will both consider the message and impact of published works, but their own curation of those stories through their magazine. They will also reflect on others stories through Flipgrid. Students will share their thoughts on various stories through the videos they publish, reflecting on the perspective of others. And finally, students will (5) ACT, and in this case, create a space and communicative culture in which differing ideas can be expressed and discussed respectfully in reaction to various news stories.
By creating a news magazine using Flipboard and by responding to student-curated stories using Flipgrid, students will research, and vet new information, not just regurgitate pre-determined information. Students will learn to generate and curate content that is most meaningful to them and most beneficial to their peers. Through their own creative process and play, students will create new ideas that will impact their own and other’s learning. These benefits are direct outgrowths of embracing a new culture of learning thanks to modern technological tools (Thomas & Brown, 2011, p. 91-99).
Check out the plan below and let me know what works and what doesn’t.
 Loading...
Click here for the Google Doc of the lesson plan.
References
Carneiro, J. (2018, January 5). Fake New [Digital image]. Retrieved August 4, 2018, from https://www.flickr.com/photos/125816678@N05/38618051835
Hobbs, R. (2011). Digital and media literacy: Connecting culture and classroom. Thousand, Oaks, CA: Corwin/Sage.
Thomas, D., & Brown, J. S. (2011). A new culture of learning: Cultivating the imagination for a world of constant change. Lexington, Ky: CreateSpace?.
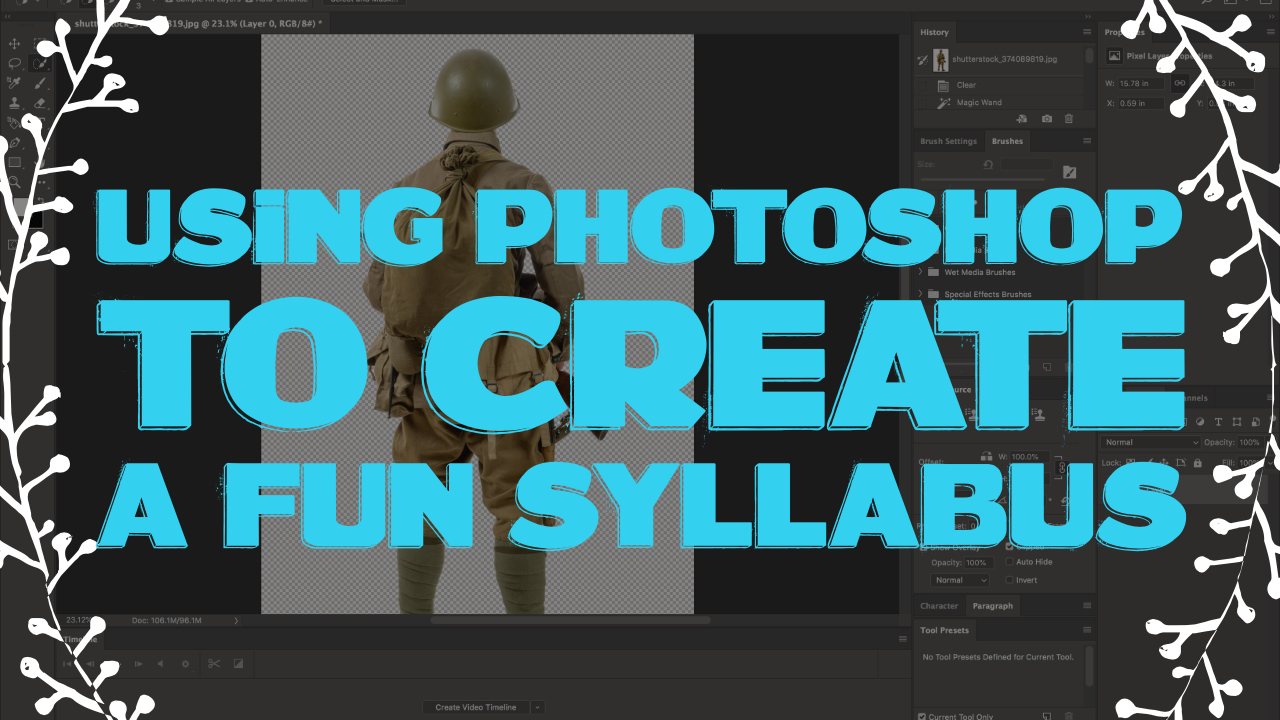
USING PHOTOSHOP TO CREATE A FUN SYLLABUS: PART 3
Posted on Aug 4, 2018 Leave a Comment
Over the last several weeks, I’ve set out to learn some basics of Photoshop (Check out Part 1 and Part 2 Here). I’m no graphic artist, nor do I desire to make a career shift from education. Instead, I see this—and Adobe’s suite of tools in general—as incredibly useful technologies that can be effectively utilized in creating classroom and learning content.
As a goal in just starting out, I wanted to make some creative but straightforward images that could be used for the front pages of my course syllabi.
Below you will see a short video documenting this learning journey and the syllabus cover for AP World History that I created using Photoshop.

All images are from Shutterstock and are personally owned. All images were edited using Adobe Photoshop. The final syllabus was created in Pages. The spoken audio was recorded and edited in GarageBand. The music is from Nicolai Heidlas. The screencast was captured using iShowU. The video and audio were edited using iMovie. The logo and thumbnail were created using Adobe Spark, part of the Adobe suite.
(Re)Creating A Flexible Learning Classroom Environment
Posted on Aug 2, 2018 Leave a Comment
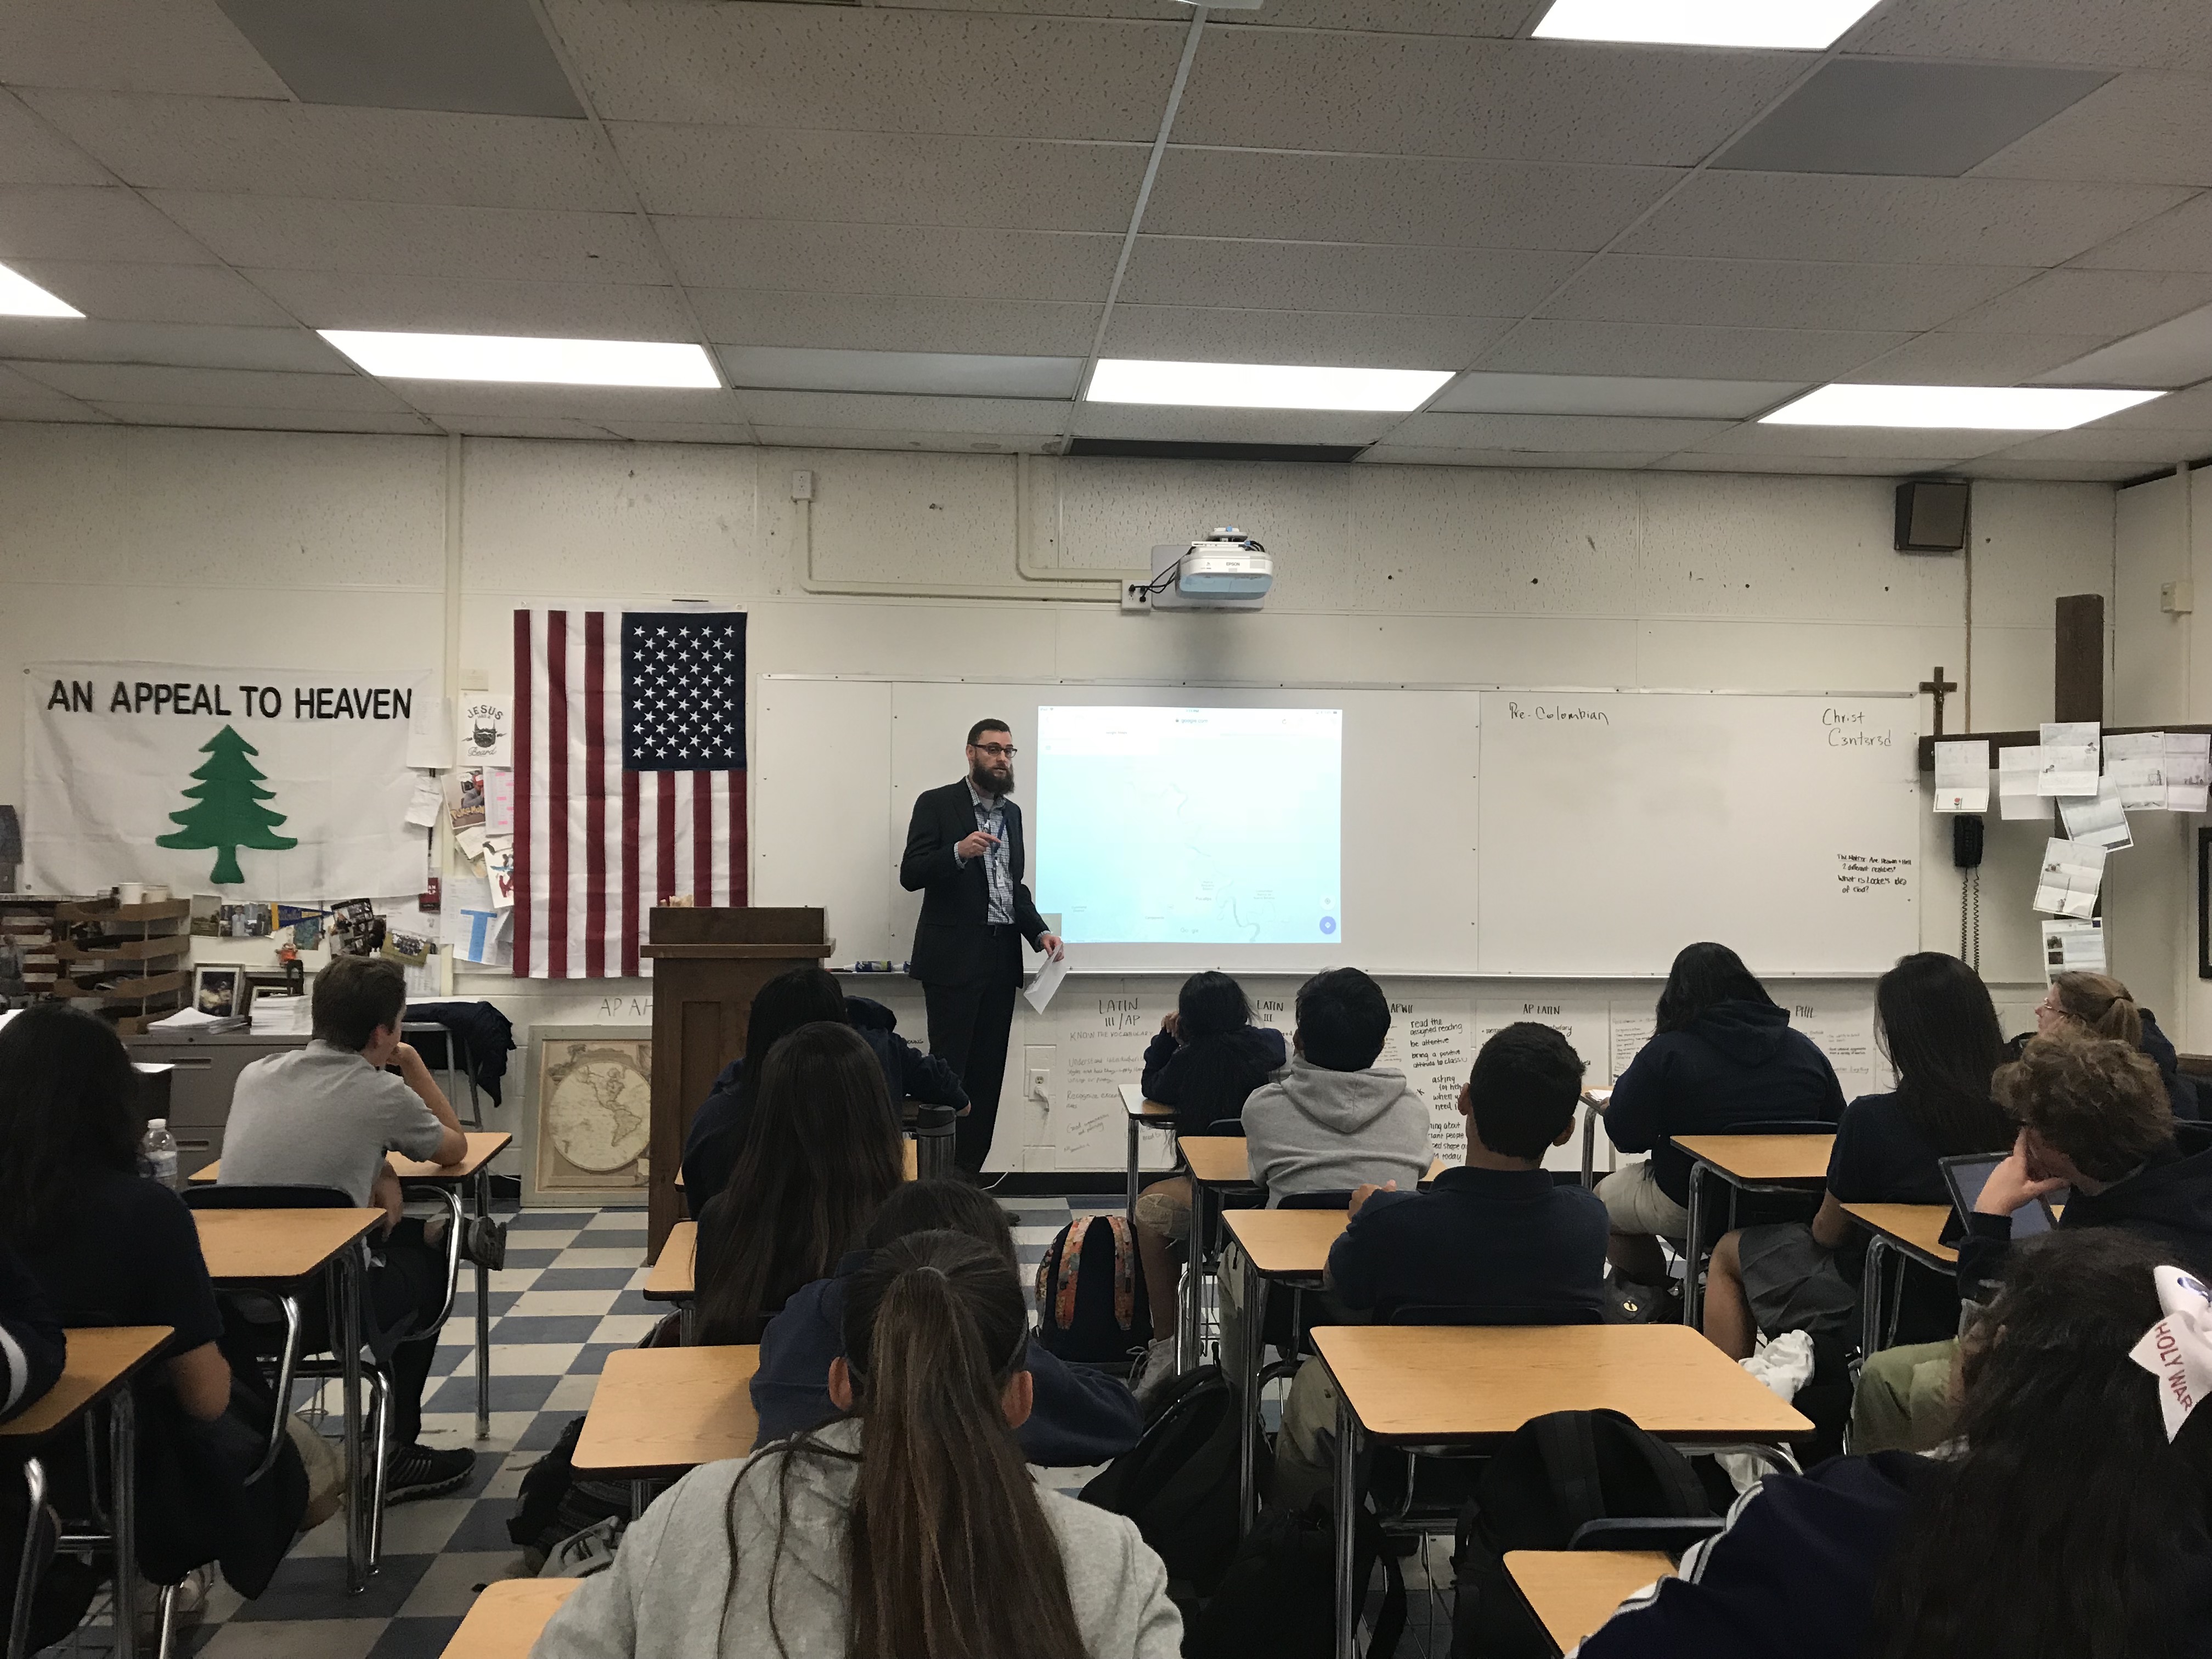 Starting out as a High School teacher, I went right to where I was comfortable. I had spent years delivering speeches and lectures. I knew how to lecture well. I created elaborate supportive keynotes rich in media, and lectured every day, in every class, for years. My classroom reflected it. It was designed like a lecture hall, rows of desks facing forward with students staring at my podium and projector. I positioned these students for an information download, and it didn’t matter whom they sat next to or what their individual learning needs were, the class was about me and my content. It wasn’t differentiated. It wasn’t personalized. There were no pre-assessments for prior knowledge. They needed to memorize the facts I gave them and regurgitate them on a multiple choice test. My entire educational approach, from instruction to physical layout, was geared toward educational mass production.
Two shifts occurred. I began to recognize the problem in my design. I didn’t have time for analysis, primary sources, writing, thoughtful projects, and other cognitive building activities. Who cares if they knew random facts if they didn’t leave my class as more critical and creative thinkers? Indeed, according to recent studies in how people learn, students are best served by developing intellectual tools and strategies in acquiring knowledge that allows them to think more productively (Bransford, Brow, & Cocking, 2000, p. 5).
At the same time, my school launched an iPad1:1 program. I suddenly had classes full of students with powerful technology, and they were only using it to take notes from my lectures (or take photos of my lecture slides—which drove me crazy).
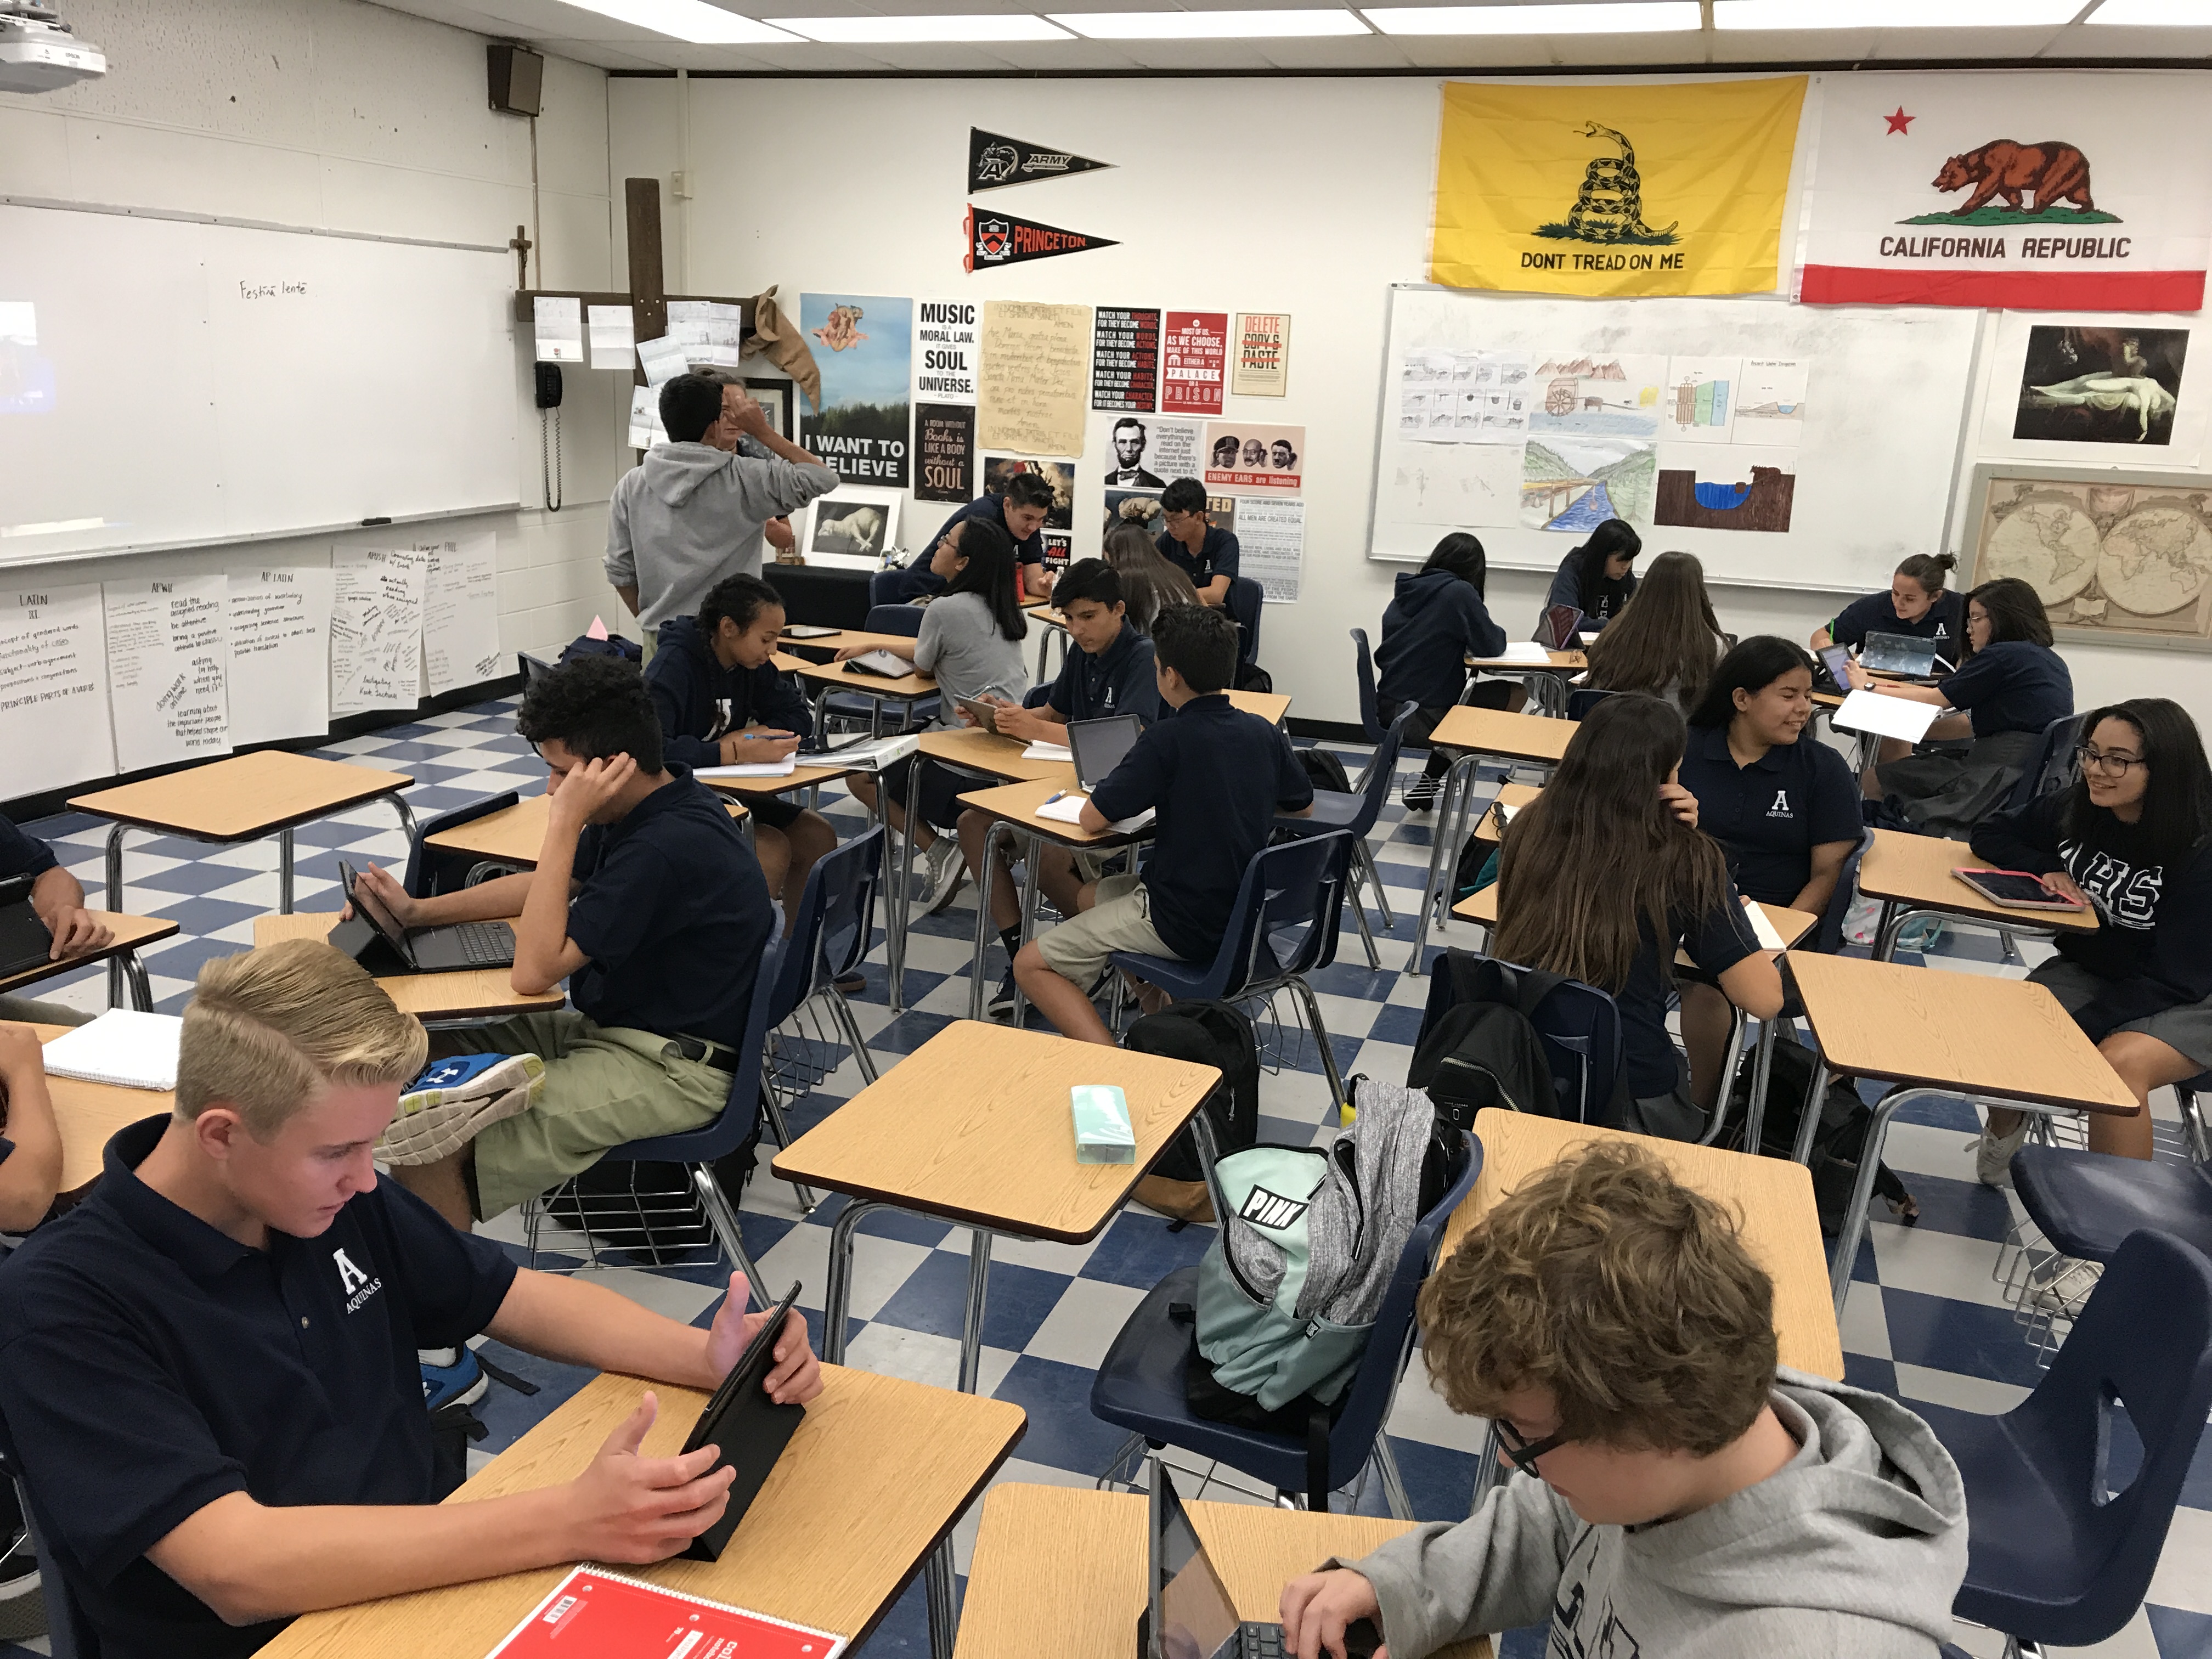
Students collaborating in small groups using their iPad to problem-solve a historical “compare and contrast” dilemma (2017)
It was time for a shift. I killed lecture. I made space for all the analytical and cognitive thinking, projects, and collaborative problem-solving. However, my physical space told otherwise. It showed that little had changed. All the desks were still arranged facing forward. Students would break into collaborative groups by moving their chairs, but I continued to maintain my class layout reinforced by my old pedagogical philosophy. Even by entering the space, I was engraining an implicit and unspoken statement to my students about the “normal” way of education in which classes face “forward” toward the Sage on the Stage.
Indeed, the kind of learning needed requires a change in the physical layout—a different type of space for community learning that would allow students to engage in “discourse practices” that would enable learners to construct knowledge together (O’Donnel, 2012, p. 63). Moreover, Warner and Palmer observe that learner-centered flexible classes need to provide students with choices in the “pace, place, and mode” of their learning (Wanner and Palmer, 2015, p. 356). My classroom is not currently designed for this better way of learning.
Local coffee shop culture has inspired me. These spaces are a blend of community, collaboration, study, and discussion. From early morning studying to “open mic” and “guest speaker” nights, I want my class to be more like a coffee shop and less like a lecture hall.
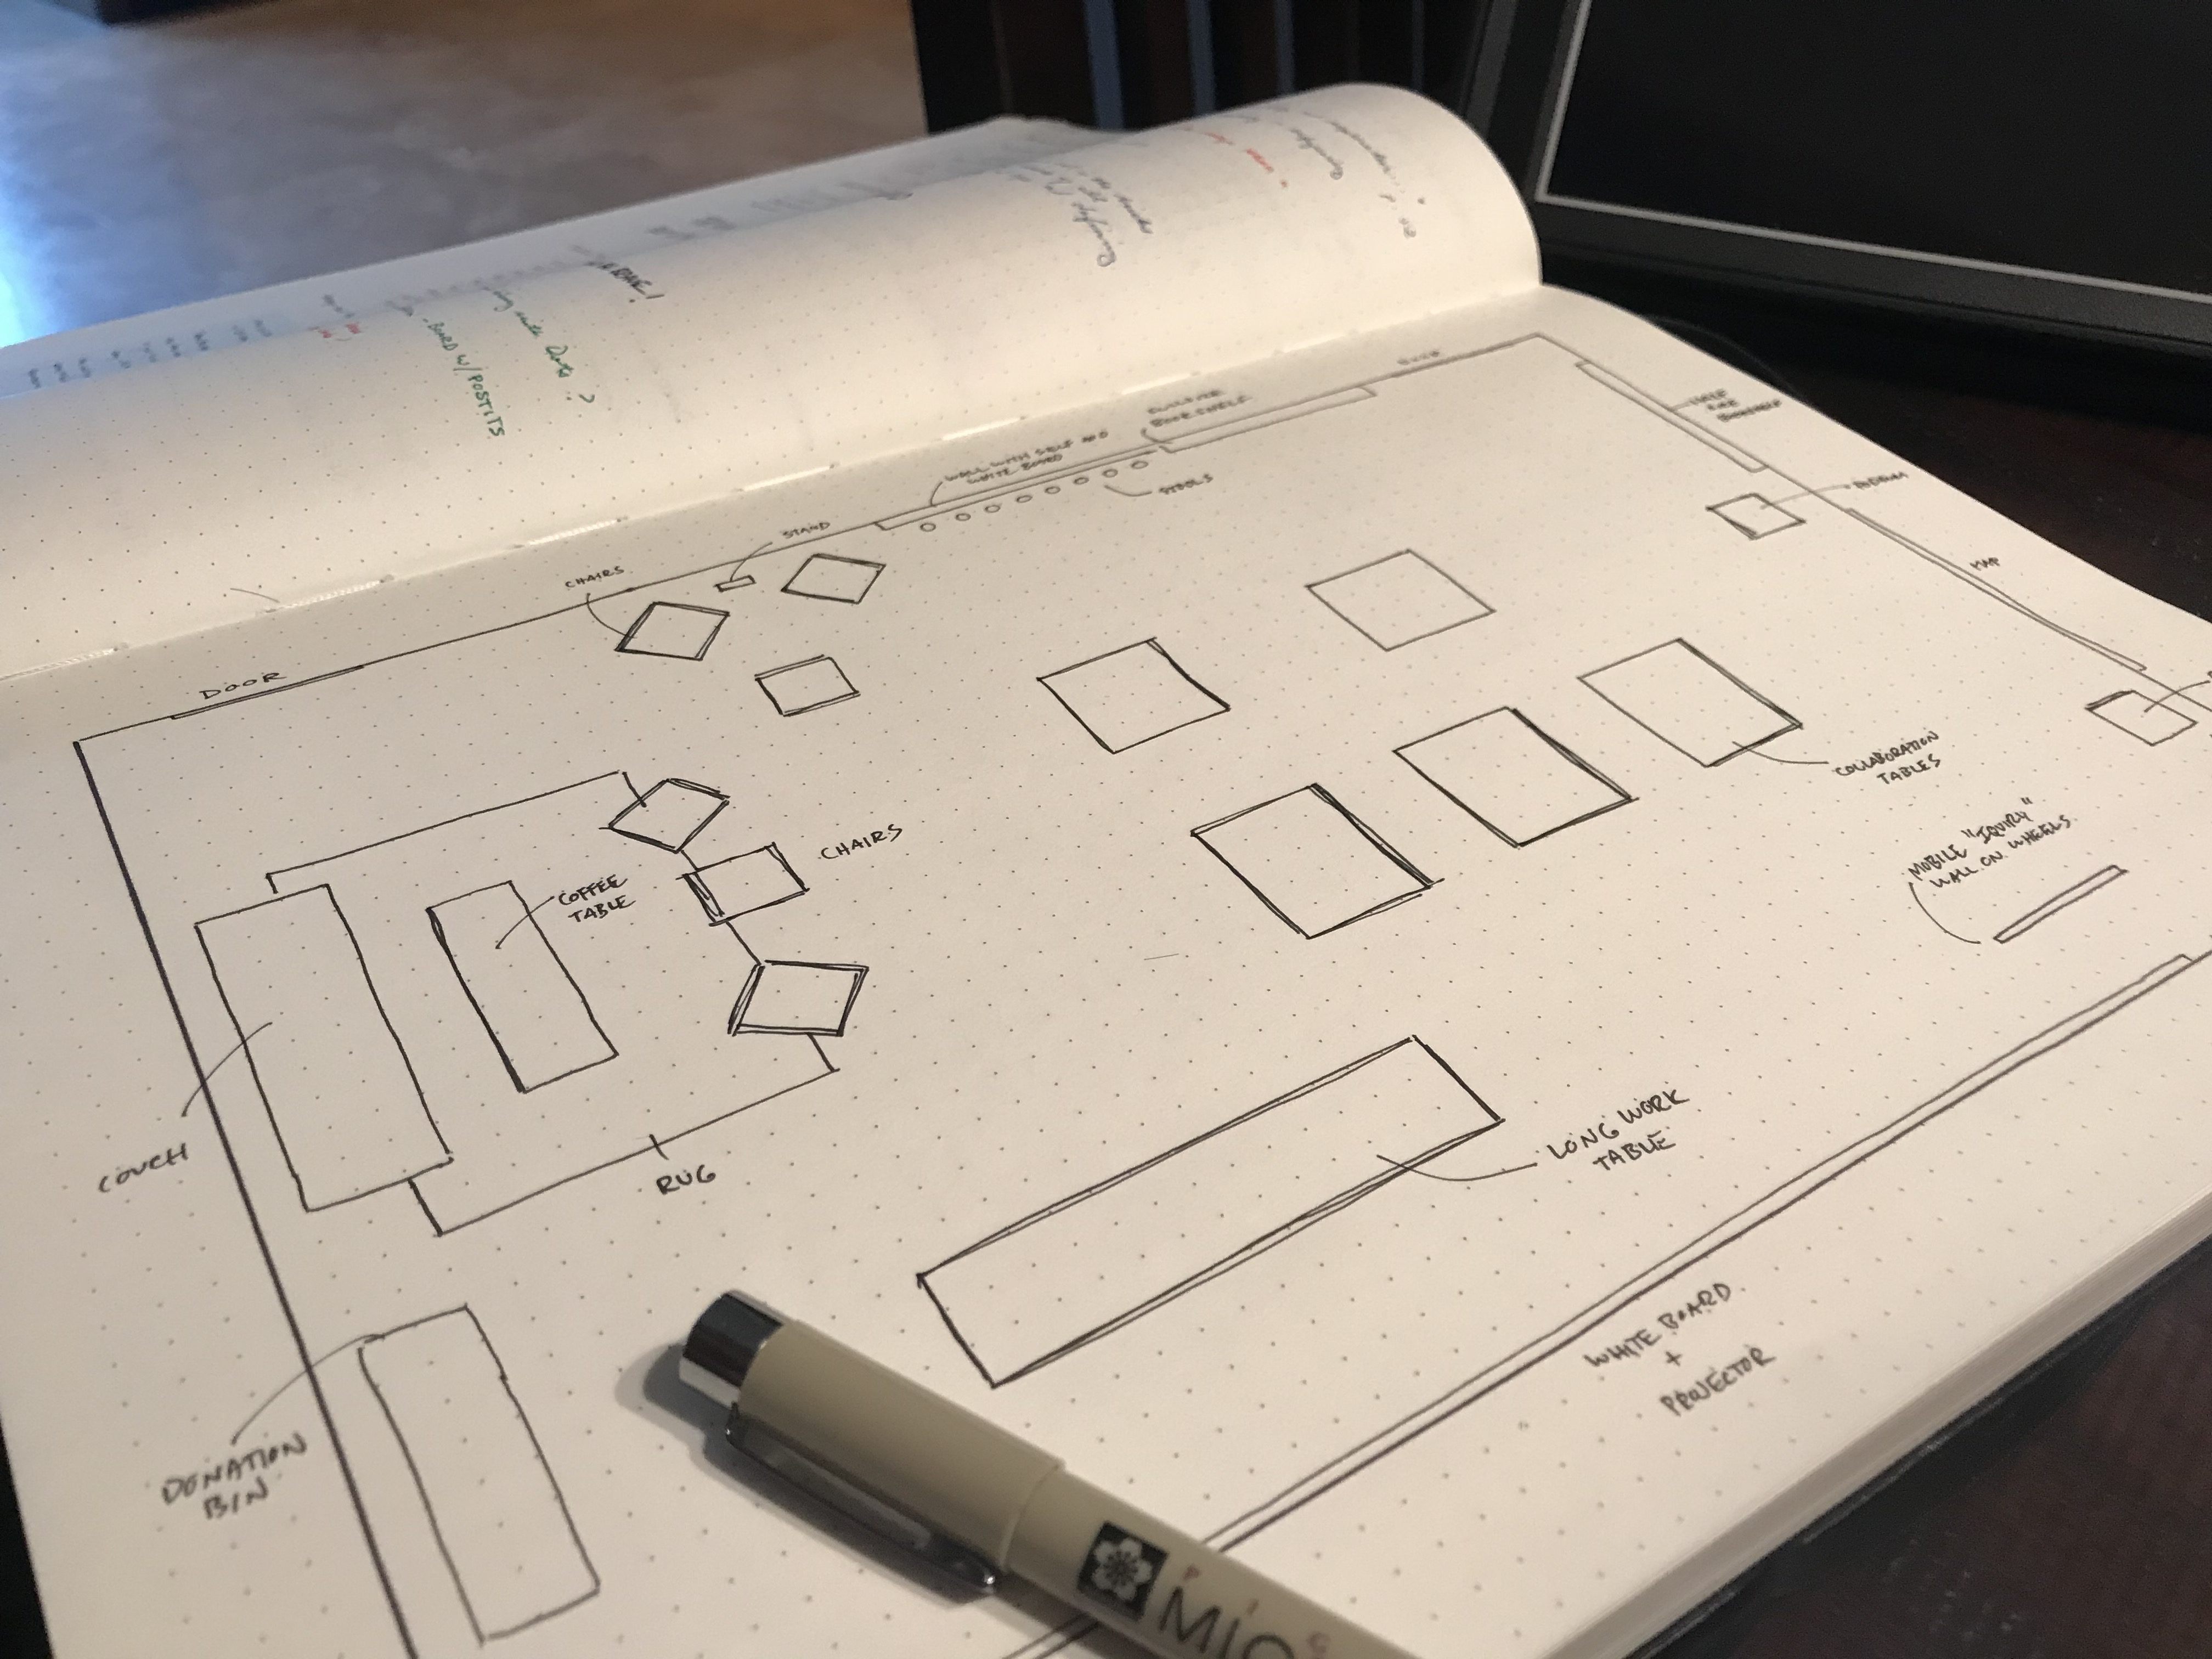
To that end, I have sketched out and designed (using the Sketchup software) a potential layout for the physical class in which I want to teach. Worthy of note is both the lack of a teacher desk and a missing “front” of the classroom. While the projector will remain on the North wall opposite the doors, this is a complete transformation of the space. I designed this class for one purpose: flexibility. This space will encourage collaboration and discussion. The work tables would enable productive and collaborative work. The chairs and coffee tables promote dialogue, though perhaps these chairs ought to have swinging small desk arms that can be pulled up for more flexible space. Whiteboards and bar stools on the south wall near the doors would allow students to discuss and brainstorm. I can see myself floating from collaborative group to group, working with each according to need.
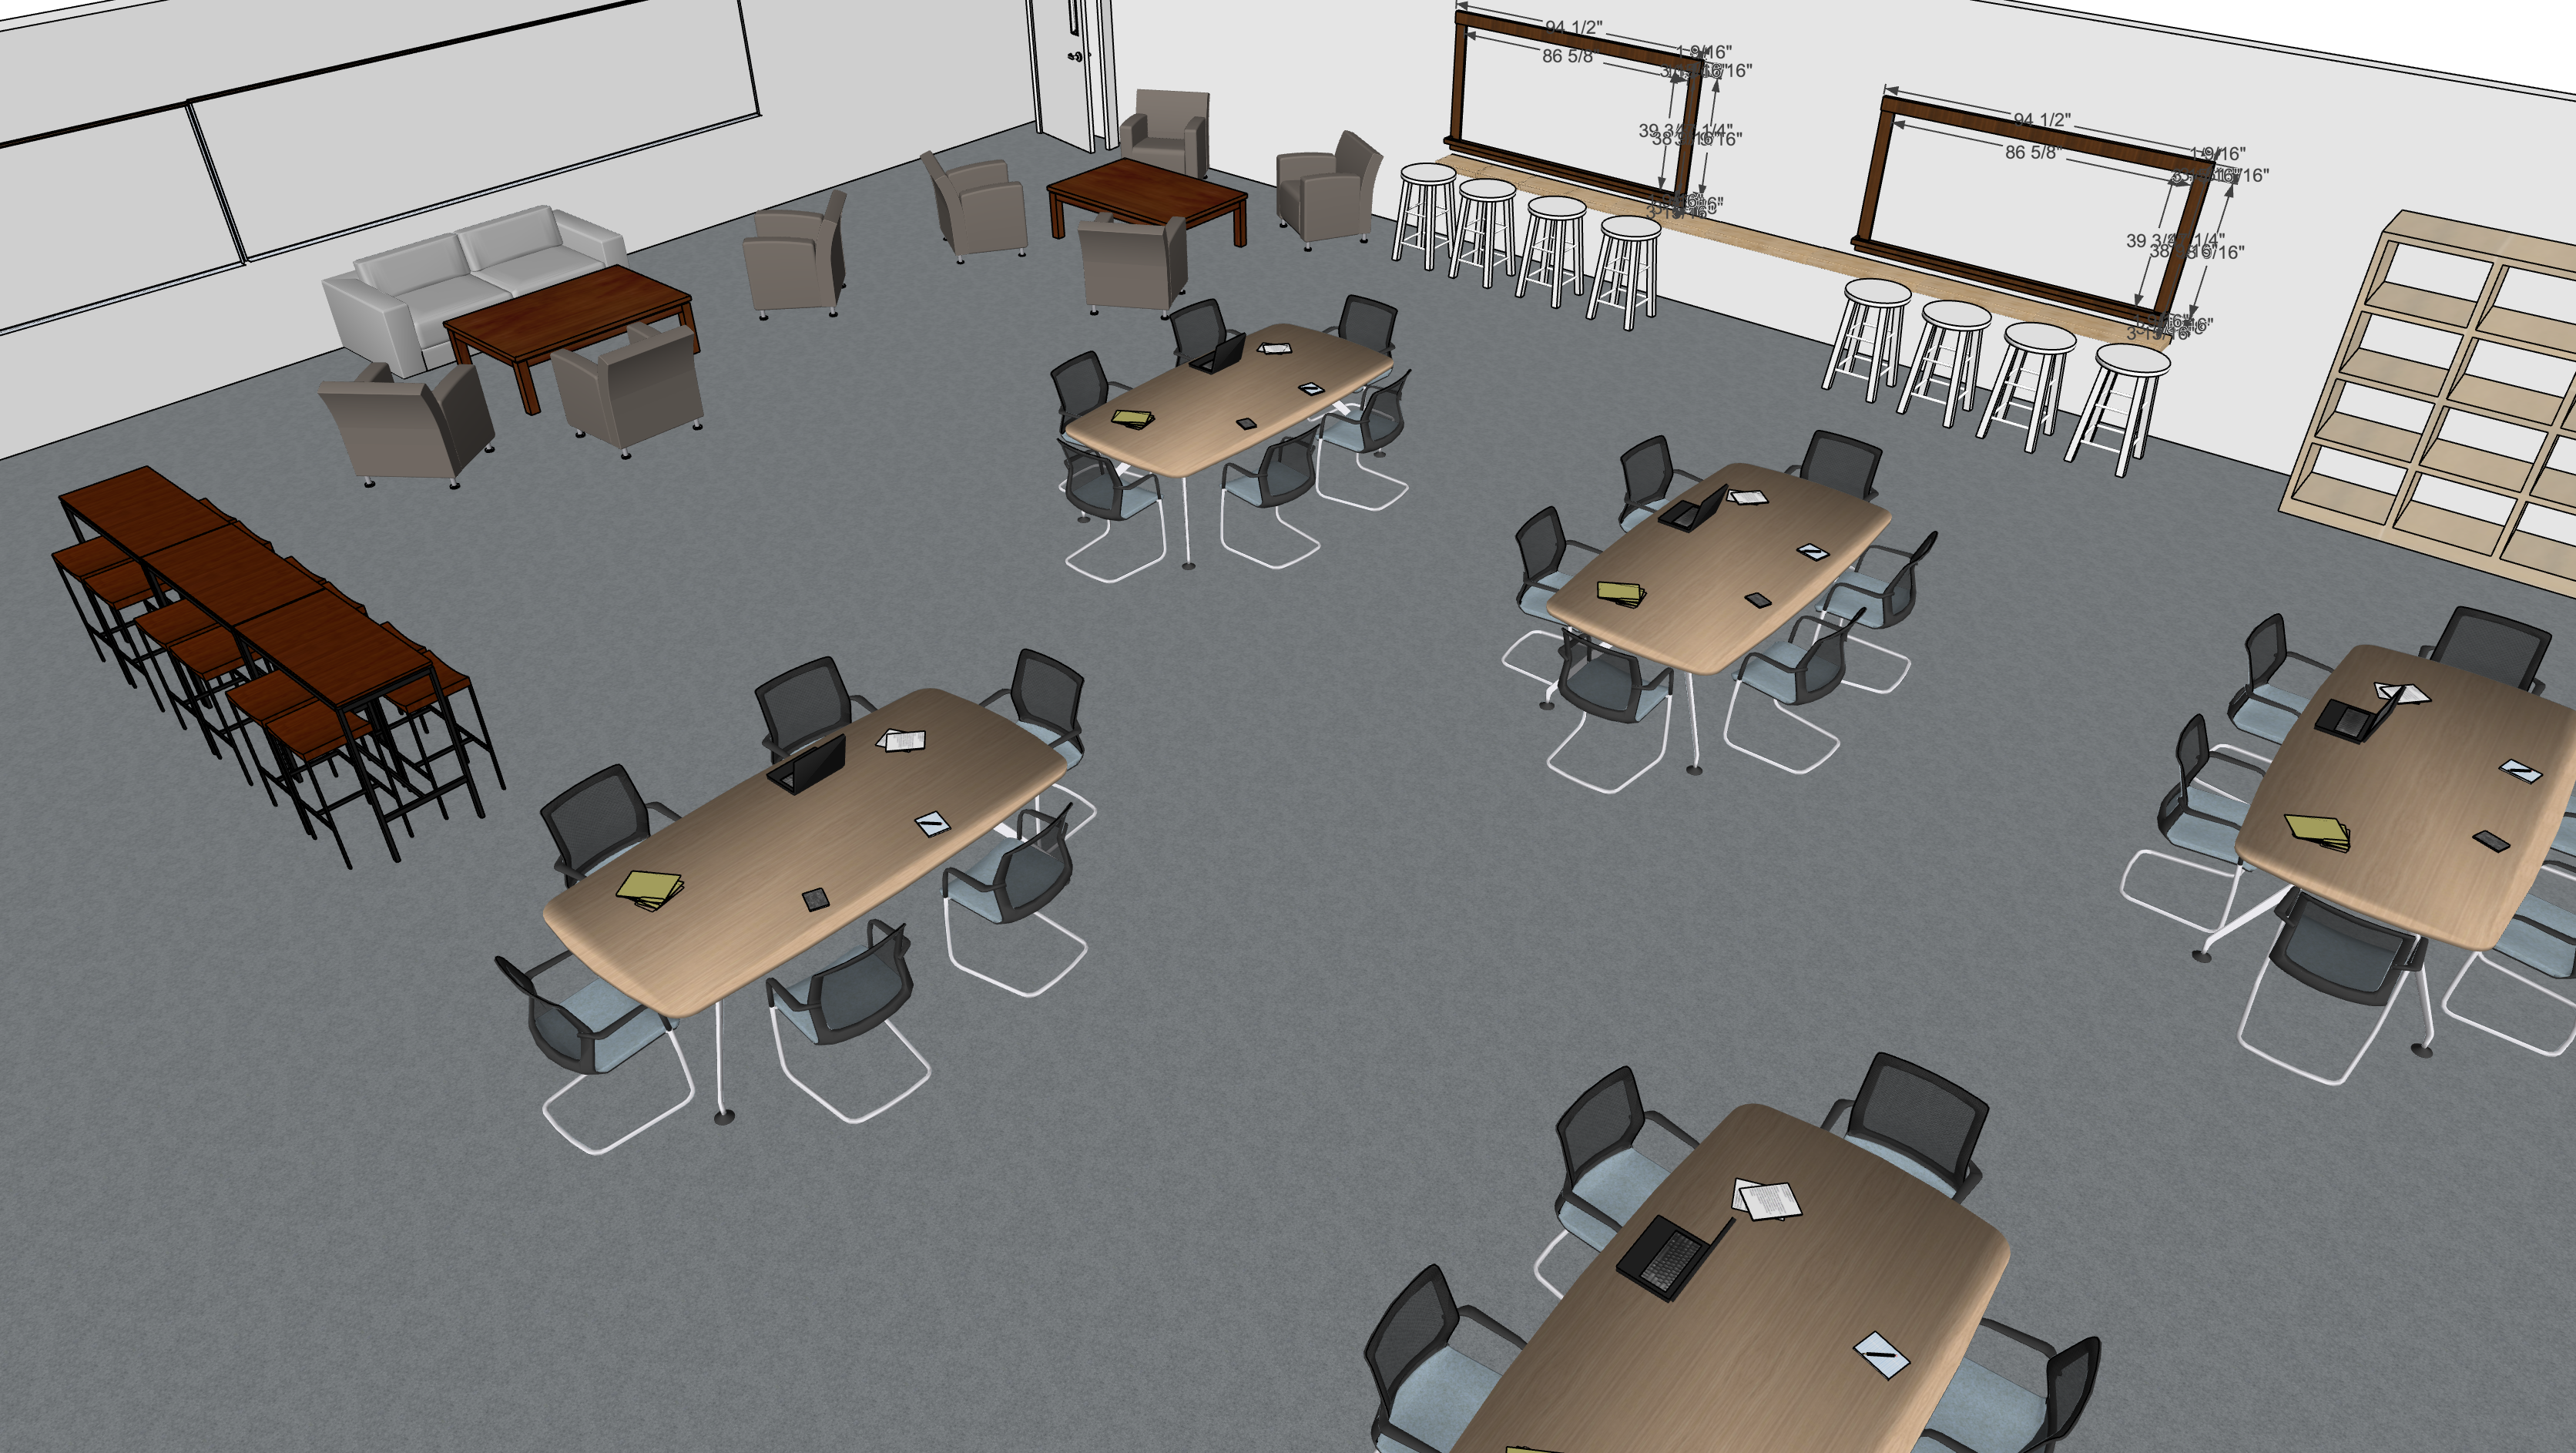
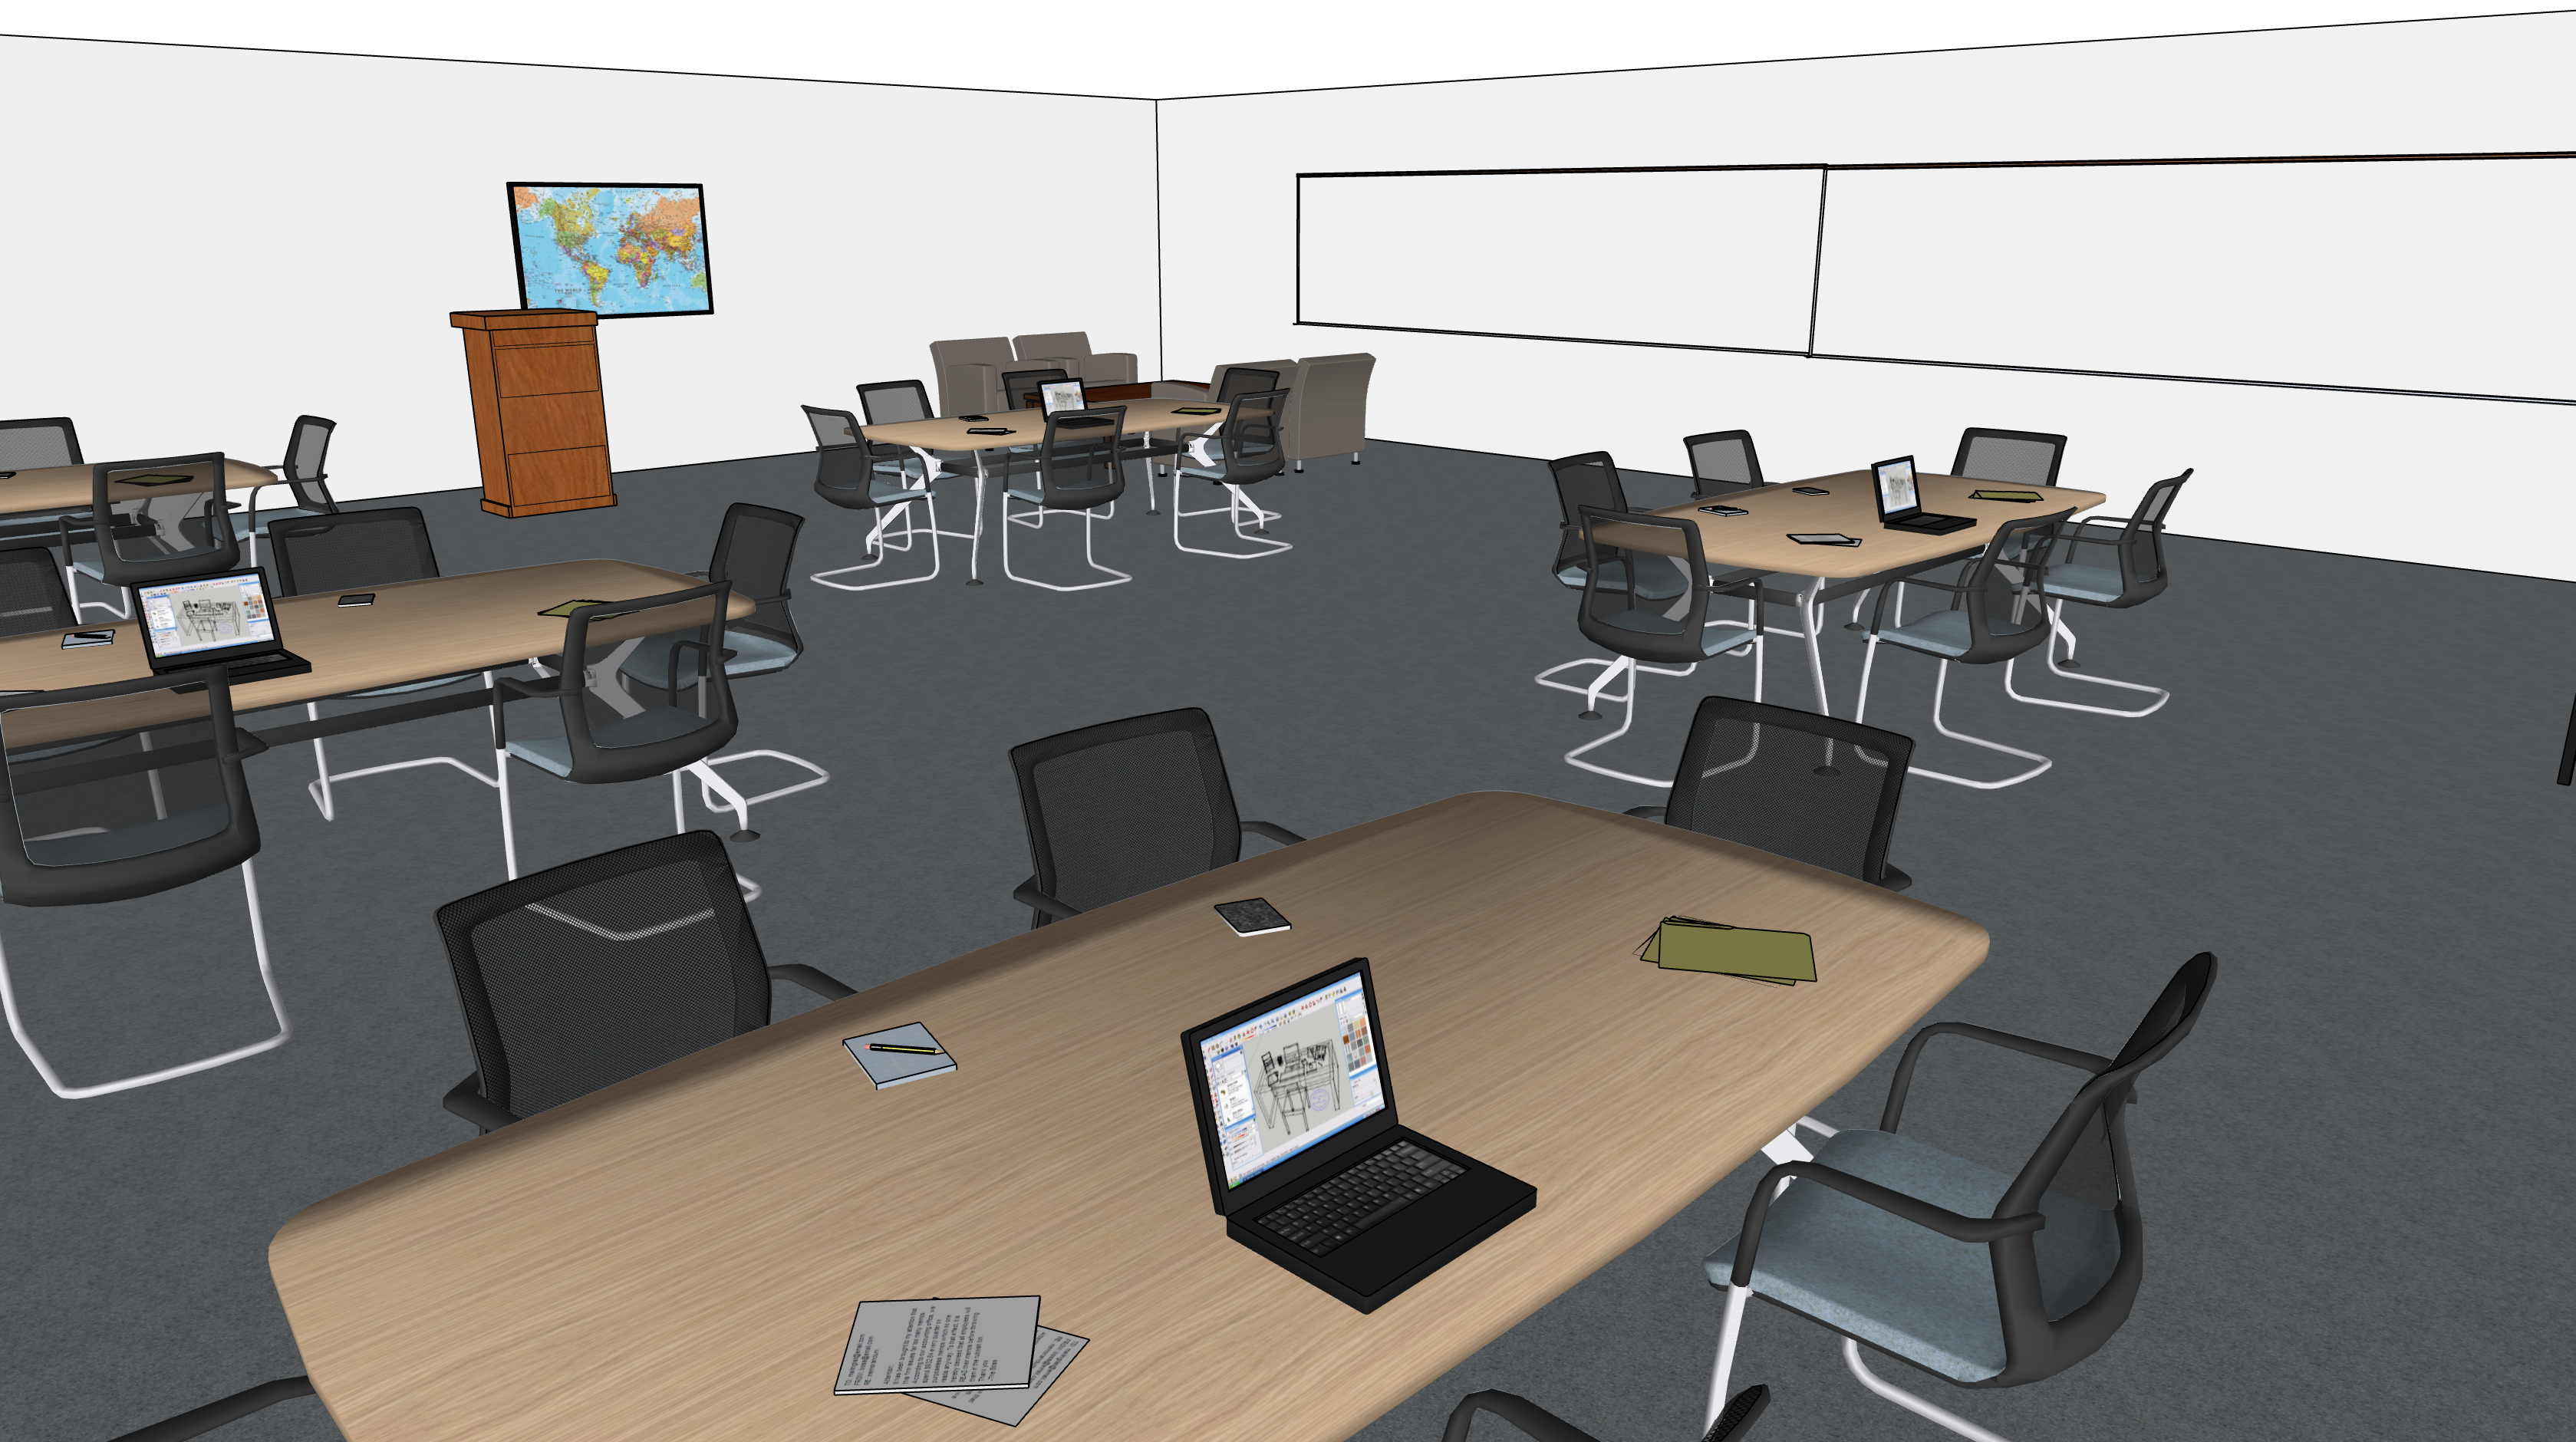 This classroom could be amazing.
While not all of these transformations need to occur at once, the first step will be to “normalize” the rearranged desks into small clumps. Unless I acquire significant funding and volunteer work from the local community, parents, and friends, this project will take some time to realize. I can remove small portions of the class, replacing clumps of desks for sets of chairs and tables as funds become available. I estimate that the transformation will take several thousand dollars, a price tag far to steep for a small non-profit private school serving a low-income city like San Bernardino. I am looking into flexible seating grants and crowd-funding sites that will help bring this transformation alive.
I have created an AdoptAClassroom campaign for funding this project. If you have extra resources, please consider donating or if you are a teacher and know of a grant for which I can apply, please leave me a message below.
If you have any other suggestions or ideas, please share.
References
Bransford, J.D., Brown, A.L., & Cocking, R.R. (2000). How people learn: Brain, mind, experience and school. National Academies Press. Retrieved from http://www.nap.edu/openbook.php?isbn=0309070368.
O’Donnell, A. (2012). Constructivism. In APA Educational Psychology Handbook: Vol. 1. Theories, Constructs, and Critical Issues. K. R. Harris, S. Graham, and T. Urdan (Editors-in-Chief). Washington, DC: American Psychological Association. DOI: 10.1037/13273-003.
Wanner, T., & Palmer, E. (2015). Personalising learning: exploring student and teacher perceptions about flexible learning and assessment in a flipped university course. Computers and Education 88, 354-369.
TRADE ROUTES and TECHNOLOGY: AN EDTECH AND MAKER LESSON PLAN
Posted on Jul 29, 2018 Leave a Comment
Students need to engage with the profound topics of the past in new and fresh ways. Gone are the days of dusty old tomes and boring old lectures. Thus, it is no mystery that many students hate History and think it is so dull. I want to be part of a movement that makes history sexy again. Yes, science classes have the chance to blow things up and light stuff on fire. That is a hard one with which to compete. However, with a little creativity and ingenuity, I believe creative and powerful lessons can abound in History classrooms all over.
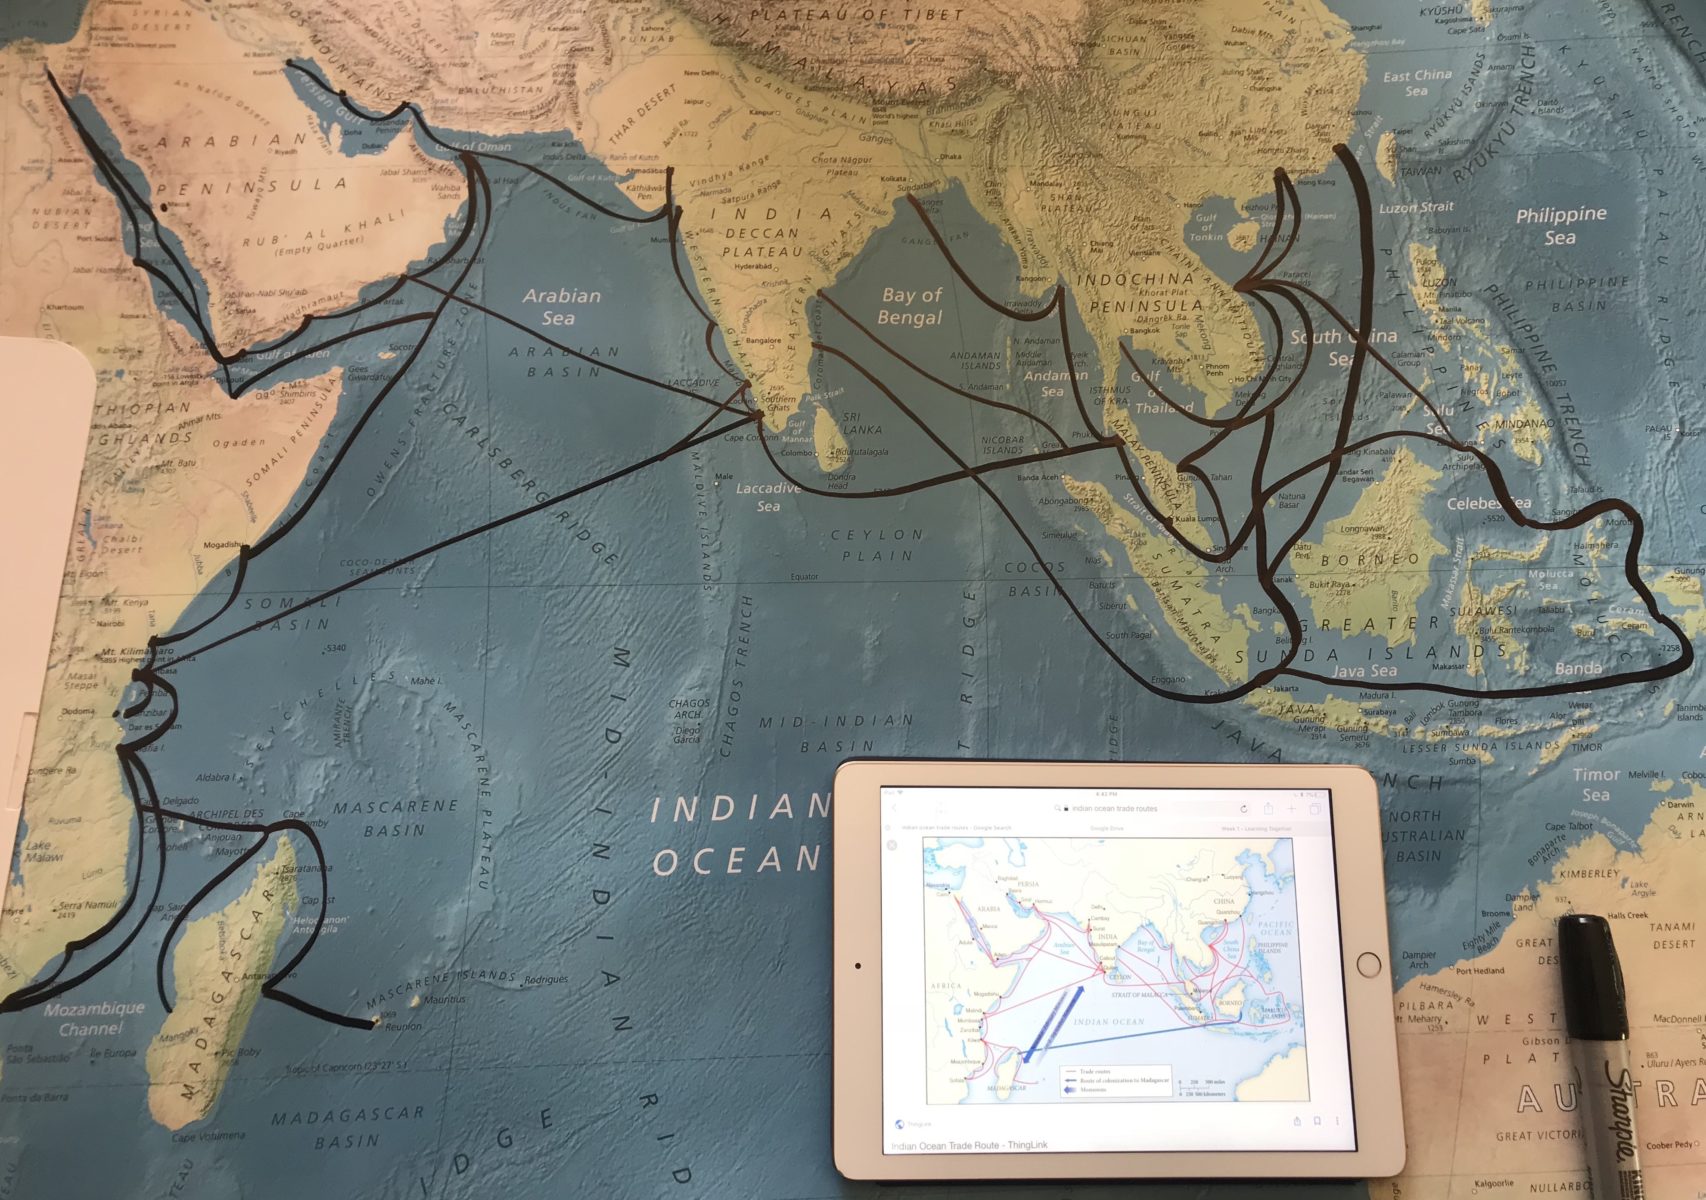
To embrace just such a transformation, I set out to explore creating interactive maps from old maps using Chibitronics paper circuits and sticker LED lights. Below you will find a lesson plan I wrote to accompany this interactive map project. Please let me know in the comments below if you have any suggestions on how to make this lesson plan and activity better. I hope you have fun with this activity as much as I did making it!
*For materials and where to purchase them, see Chibitronics on Amazon. There are some cheaper routes if one buys the stuff à la carte, but getting the material together quickly and inexpensively is no difficult task!
Loading...
For a direct link to a Google Doc for your own download and editing, click here.
PHOTOSHOP PROJECT: PART 2 — REMOVING SOLID COLOR BACKGROUND IMAGES
Posted on Jul 28, 2018 Leave a Comment
 (For Part 1, click here) Photoshop is overwhelming. When I first opened the application and uploaded my first picture, my eyes glazed over at the vast number of buttons and options. Like all new platforms, systems have their own logic and order. I had always been accustomed to specific technology platforms—MacOS, Windows, etc. This was something completely different. Yes, there is a virtual cornucopia of help on the internet, but in some sense, there is too much. There are thousands of “how to” videos on Youtube, and each has a different style and way of teaching.
 When I first sat down to edit my first image, I opened a few videos and realized that many of the instructions were from 2017 and earlier. Adobe Photoshop recently released the 2018 version. And while it is not a fundamental redesign, many of the buttons and tools in the “how-to” videos are located in different places. After a quick search for “Photoshop 2018”, I found several videos that were helpful. I used CasualSavage’s video on background removal tools most beneficial. However, I still had to pause the video several times and try things out for myself.
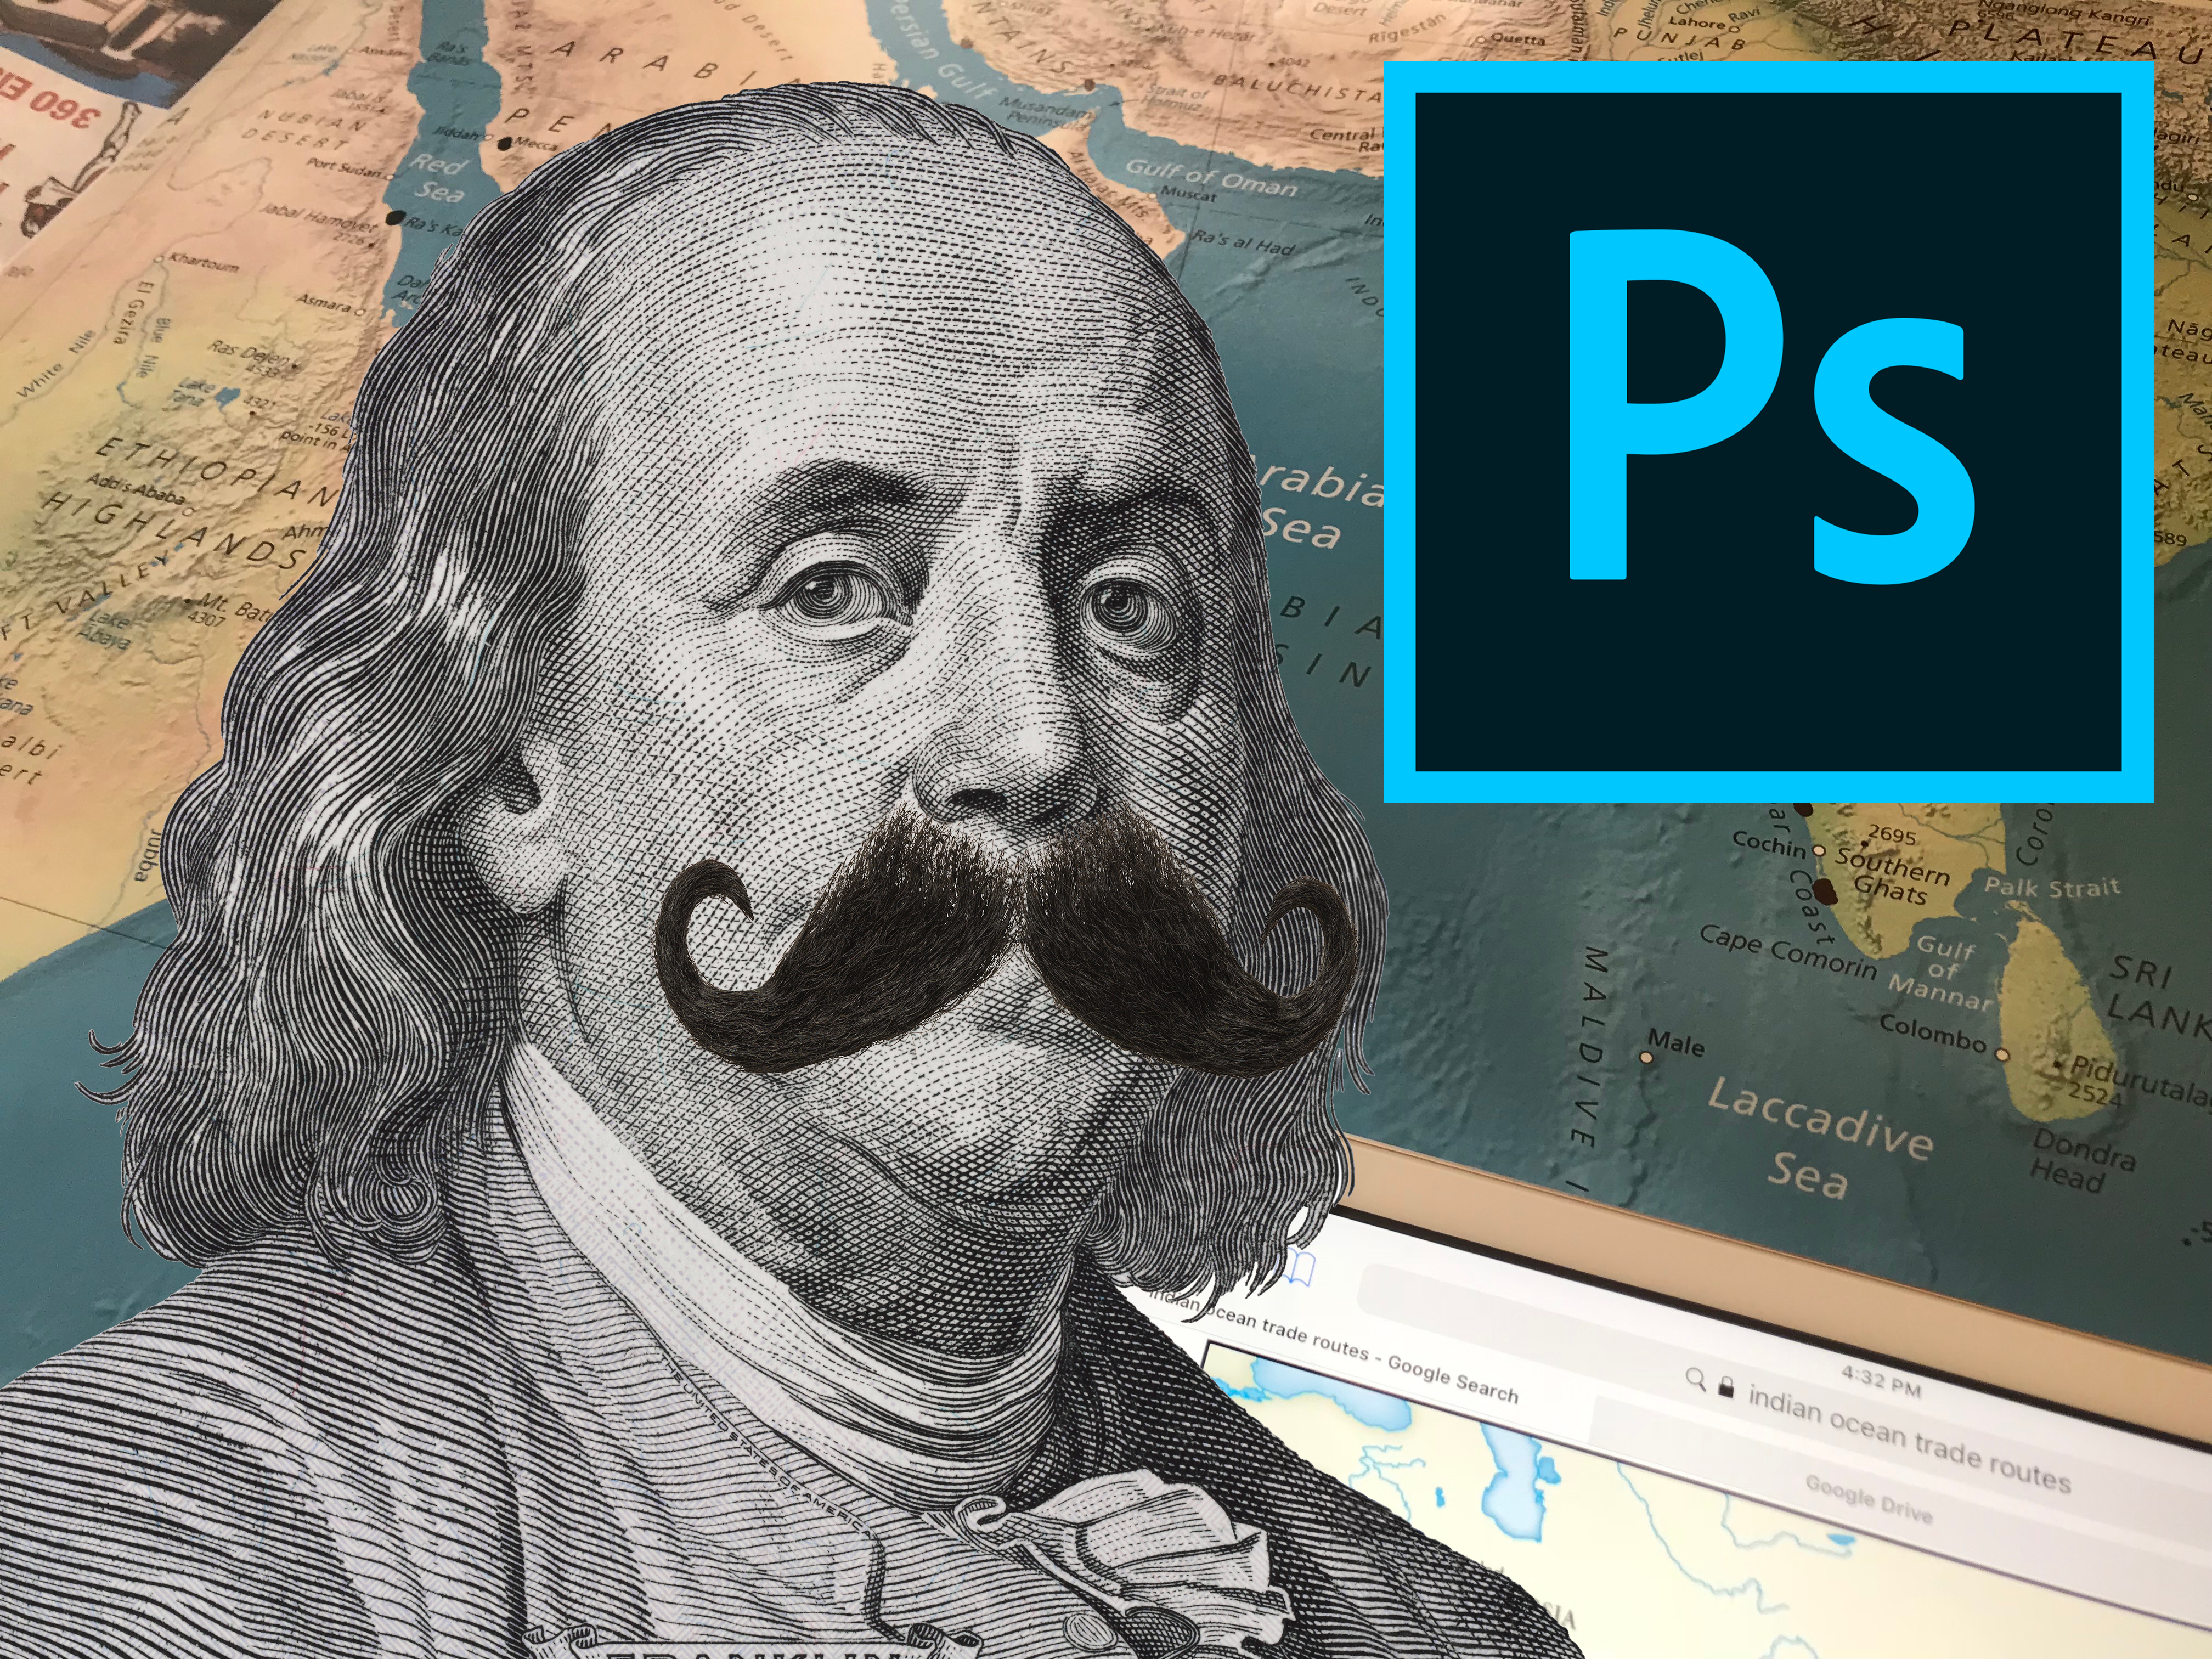
No matter how many “how-to” videos one watches, playing with the software is absolutely critical. Realizing that you aren’t going to break it and playing around with new software is a powerful tool for learning. In fact, despite watching several videos, I learned that if one tries to remove the background from a locked image, the software will execute a rather odd command. It will take the foreground image texture and populate the background. A strange mustache with a mustache background resulted.
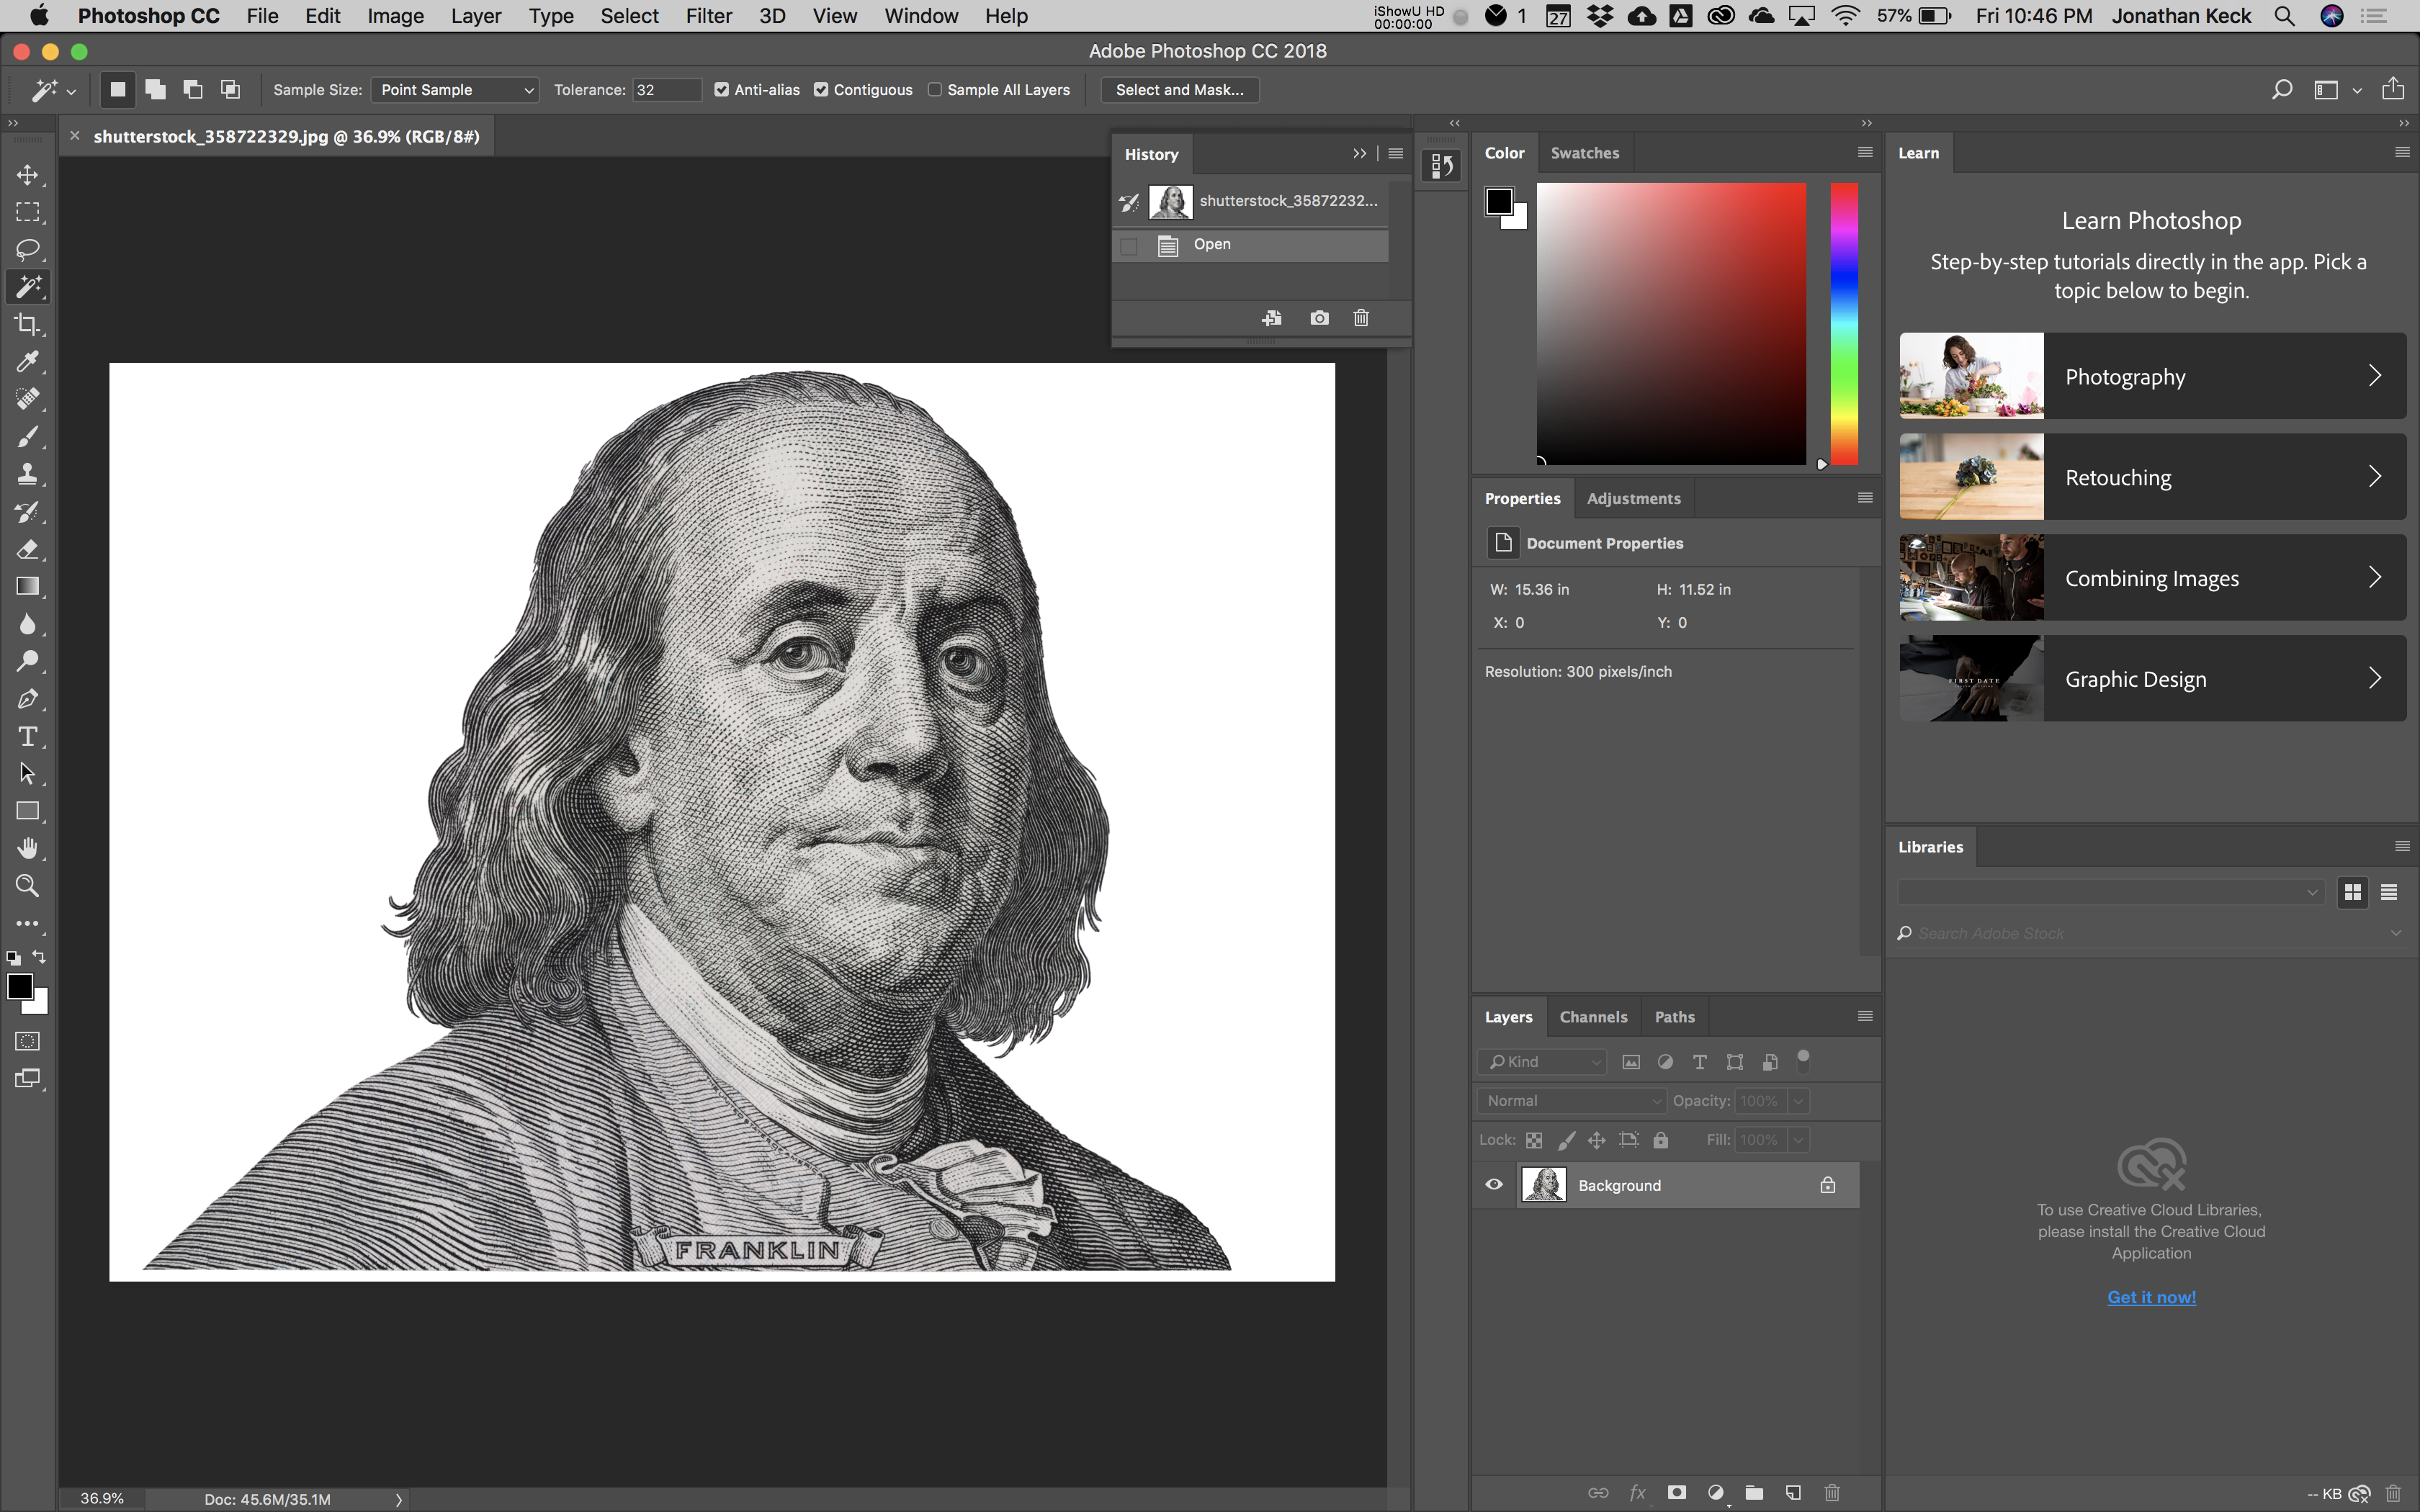
 As part of a Photoshop 101 activity, I decided to remove the background from two images. Both have solid white backgrounds, which makes the task rather straightforward.
I quickly removed the background from the Benjerman Franklin photo. However, the mustache image is more complicated. Although it has a white background, the picture does not have a clean line. The mustache has many pockets of background that shine through the faux-hair. Removal of this background is a tedious task, but doing so would produce the best result. Starting off with a broader perspective, I removed the large white background. I then zoomed in rather deeply into the image, at times down to individual pixels to remove the background. A checkered pattern displays to indicate that the background has been removed.
After I saved the two images to my desktop, I uploaded a random picture of a world map with an iPad to use as my new background. I uploaded the Benjamin Franklin photo and layered it on the new background and did the same for the mustache on Franklin. While I documented this in a short video, I also created another version of this task for the featured image in this post. I added the Photoshop icon to the right portion of the image.
Using this method took some trial and error before I recorded the actual task, but I feel comfortable with the technique. In fact, I believe that this basic technique requires little specific skill or knowledge. However, the benefits of being able to remove a picture from its background can certainly help in creating more effective presentations and documents— especially with students who appreciate a funny or well-crafted image associated with an assignment.
As a next step, I want to remove the background from a more complicated image where single color removal would be impractical.
I will continue to use PiXimperfect, CasualSavage, and Spoon Graphics for the next phase of this Photoshop basics project.
Credits: The mustache and Benjamin Franklin photos are purchased Shutterstock images. The project was created using MacOS, Photoshop, iShowU HD (Screen Casting), and iMovies (video editing). The music in the video is Gigatop.
