
TRANSFORMING THAT DUSTY OLD MAP: CHIBITRONICS, PAPER CIRCUITS, AND INTERACTIVE MAPS

At Aquinas High School (the school at which I teach) has a saying: “turning today’s students into tomorrow’s leaders.” Yet I wonder, what world are our students stepping into? It seems like something out of a sci-fi flick, but this year’s freshman will graduate High School in 2022. Of that group, the four-year college-student will graduate in 2026 and will likely head out into the job market or graduate school just before the 2030s. By this time, massive space, robotic, and bio-mechanical breakthroughs are going to transform not only the job market but the economy. According to a spokesman from Dell Technologies, “An estimated 85 percent of jobs in 2030 haven’t been invented yet. The pace of change will be so rapid that people will learn ‘in-the-moment’ using new technologies such as augmented reality and virtual reality. The ability to gain new knowledge will be more valuable than the knowledge itself [emphasis added].” (PR News Wire) Since the new information that will be vital to student success in college and career is likely not invented yet, let alone taught, it behooves the educators of today to prepare our students how to think, problem solves, tinker, imagine, repurpose, and be creative. We can teach skills and ways of thinking that will prepare them for being able to quickly adapt and gain that new technological knowledge as it emerges.
Indeed, Punta Mishra argues that technology is changing so rapidly that we should not focus our attention on specific pieces of tech to guide our education. Instead, we should concentrate on good pedagogical practices and content knowledge that uses technology effectively. “The TPACK framework emphasizes the importance of teacher creativity in repurposing technology and tools [to] make them fit pedagogical and disciplinary-learning goals” (Mishra, 2012, p. 14). TPACK—the intersection of Technology, Pedagogy, and Content Knowledge—is the golden zone of education where the most effective instruction can be provided to our students.

Our students need creative solutions to approaching our content—especially in the Social Sciences. Often these courses either have incredibly creative teachers or teachers who stick to the “Sage on a Stage” method—lecture, notes, knowledge assessment, repeat. I fear the latter may be more common. New and creative approaches need to be developed and tested. In light of this, I want to explore technology integration in creative assignments geared for the High School Social Science and Middle School classroom.
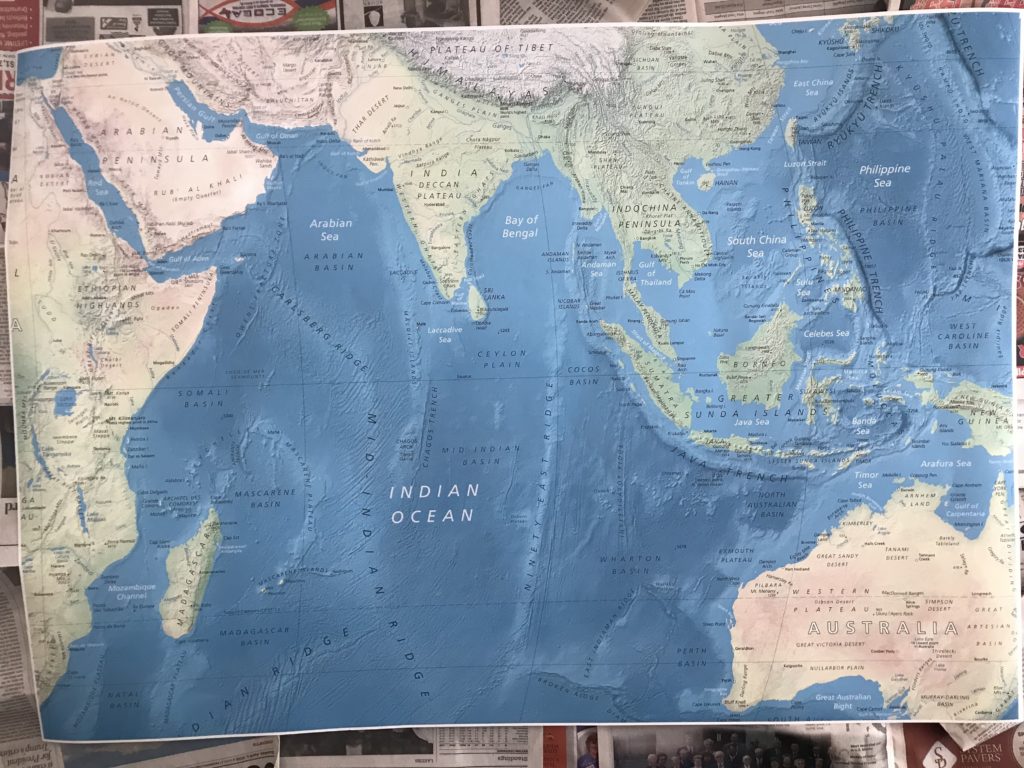
To this end, I decided to explore a fun activity with Chibitronics paper circuits and an old map of the Indian Ocean that I had on my classroom wall. I wanted to create an interactive map where a student could research trade routes from a particular era and build a circuit system that lights up trade hubs when a button is pushed.
This project is in beta, as they say. I imagine it will take students 120 minutes or so, a block period or a couple of days in the classroom should be enough. I imagine this would work well with small teams, perhaps working on different trade routes like the Silk Road, Saharan Trade Routes, Atlantic Trade System, or early Pacific Island exploration and trade.
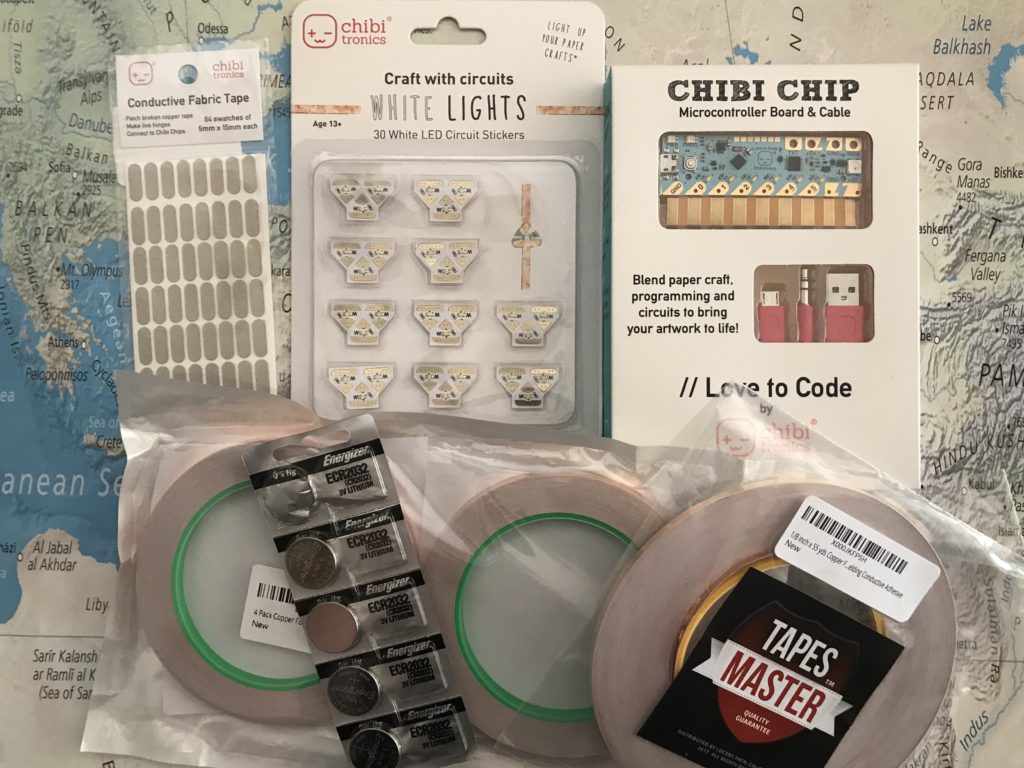
Materials needed:
The 30 White LED Circuit Stickers, (link)
4 pack copper foil tape with Conductive adhesive, (link)
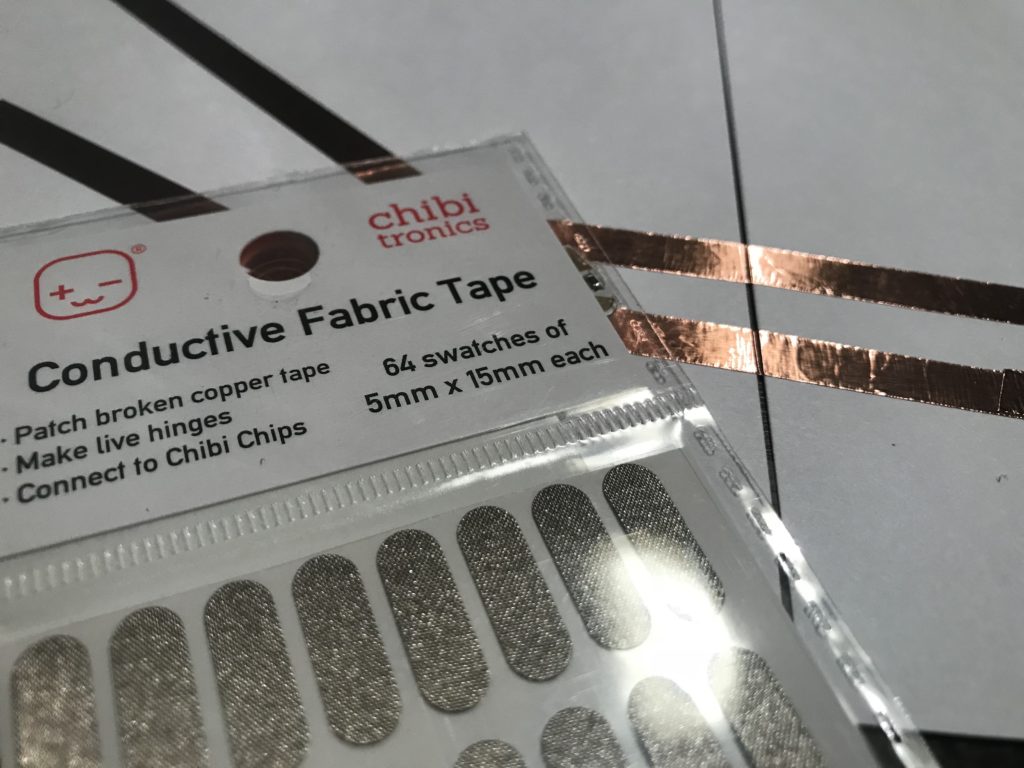
Conductive fabric tape (for patchwork and make hinges for stronger holds in weak areas) (link)
Sharpy
X-Acto or Utility knife
Cardstock paper
Tape
Flat Battery
How To: Step-by-Step:
Step 1: Find an old map that you don’t mind cutting into
Step 2: Find a helpful and reliable map of the trade networks online
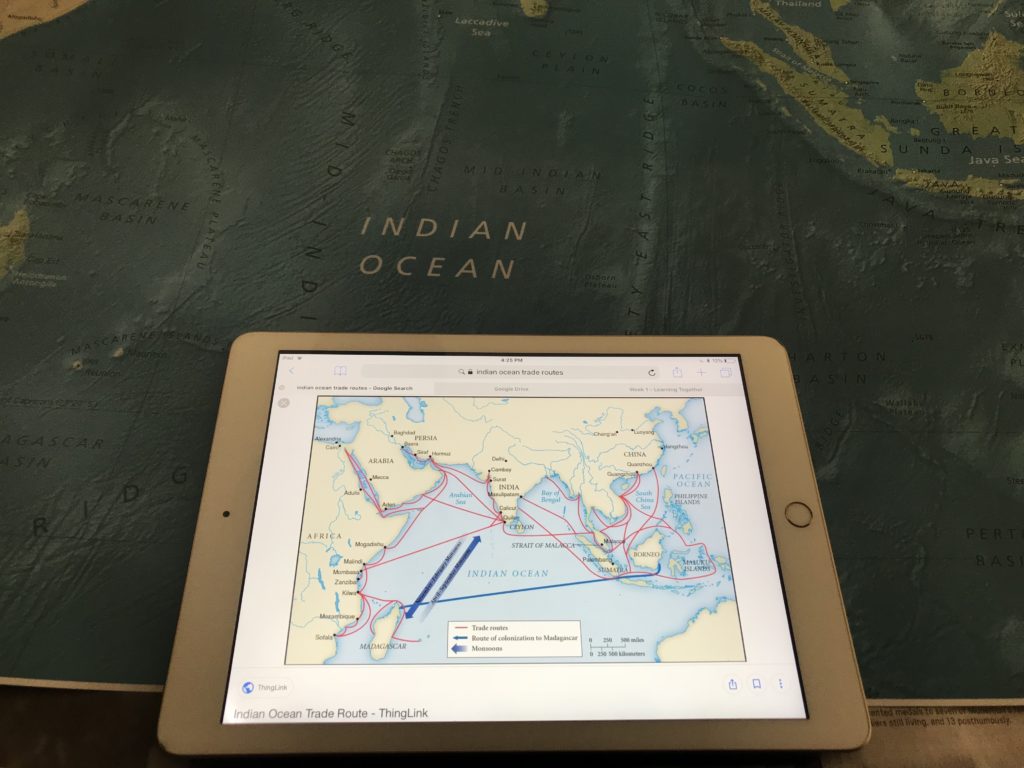
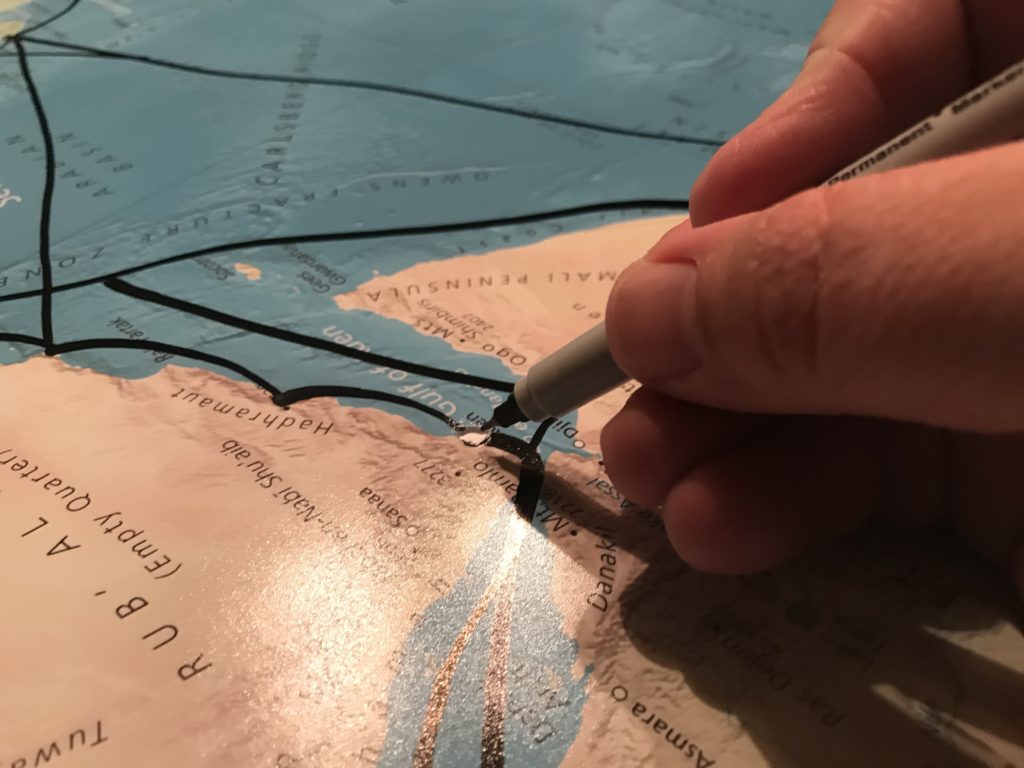
Step 3: Using the map online, mark all the trade ports—making particular note of large trade cities. You can use any marker, but I found that the Sharpie King Size Professional works best. This marker has different angles on the tip but is large enough to handle a large map. The size needed will depend on the map you are using. *Pro tip: to avoid marker bleed-through, lay down some newspaper—just in case.
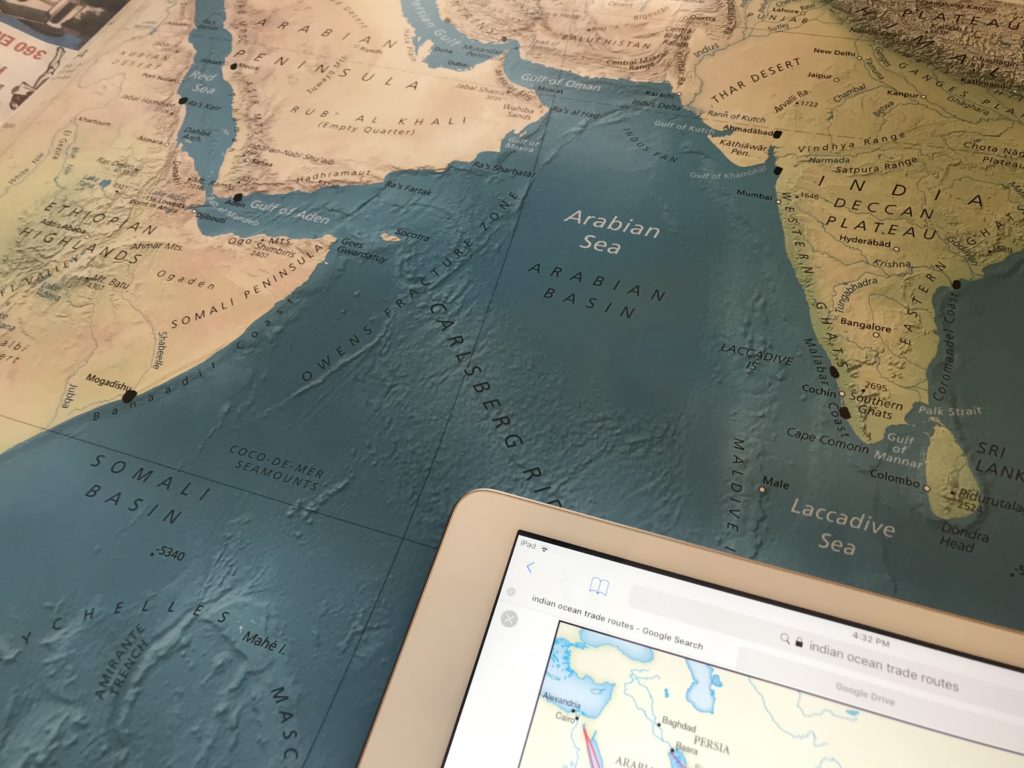
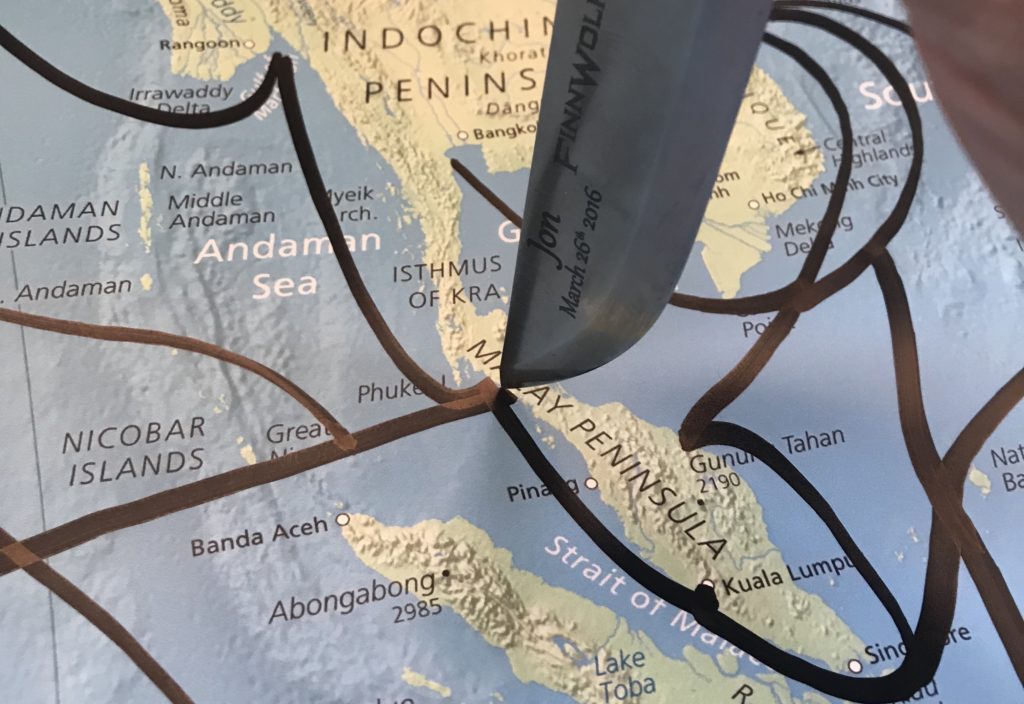
Step 4: Carefully connect the dots in the manner already illustrated on the map. This is harder than it looks, but it is actually a rather insightful process because one begins to wonder why ships took particular routes or why they went around specific islands and not others.
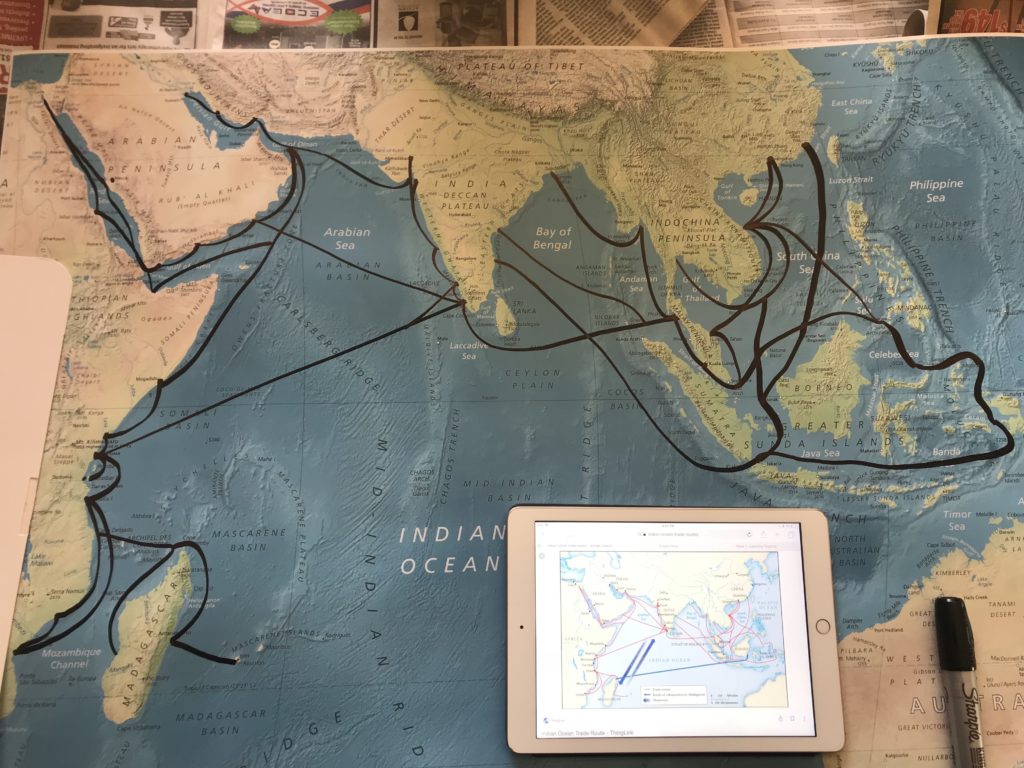
Step 5: Use a knife, preferably an X-Acto or utility knife (I learned the hard way) to cut some holes in the major ports. I only did nine of the major ports, but there are many, and depending on time and materials, you could have them do less or more. It is through these holes that the LED lights will shine through, so precision in cutting and removing excess material is best.
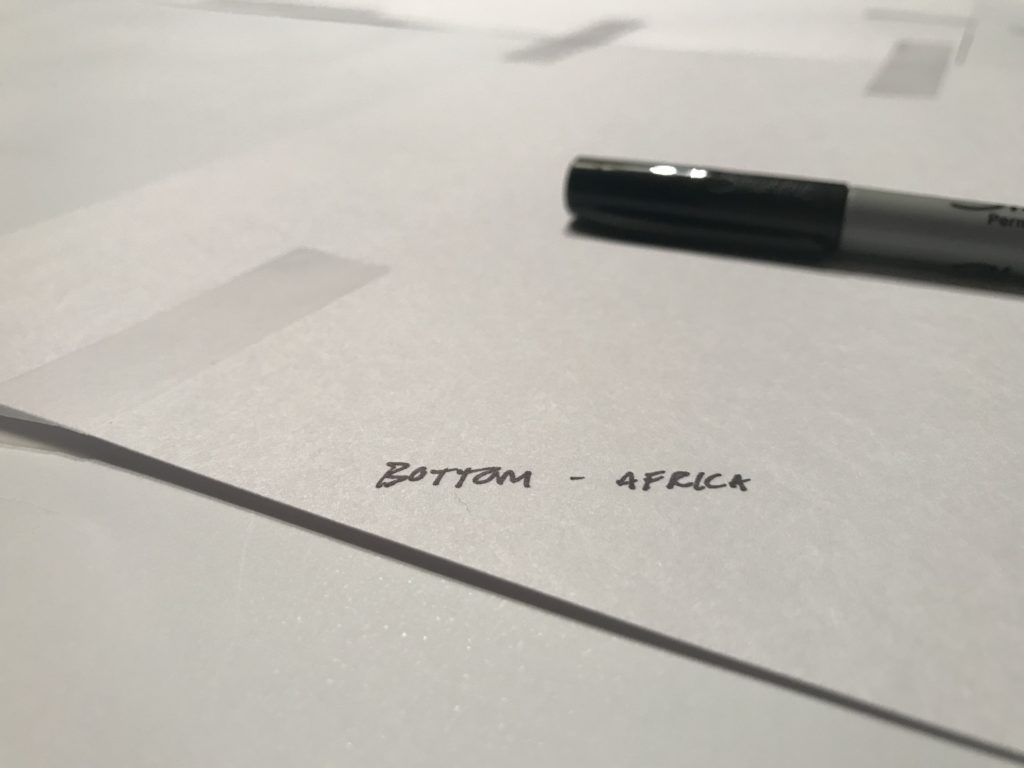
Step 6: Flip the map over and lay down card stock paper—the thicker the better—over the holes in such a way that the papers overlap and can be taped together. After they are taped together, tape the paper to the actual map so that when you flip the map over, it won’t move out of place. *Pro tip: Don’t overdo the tape to prevent damage to the map.
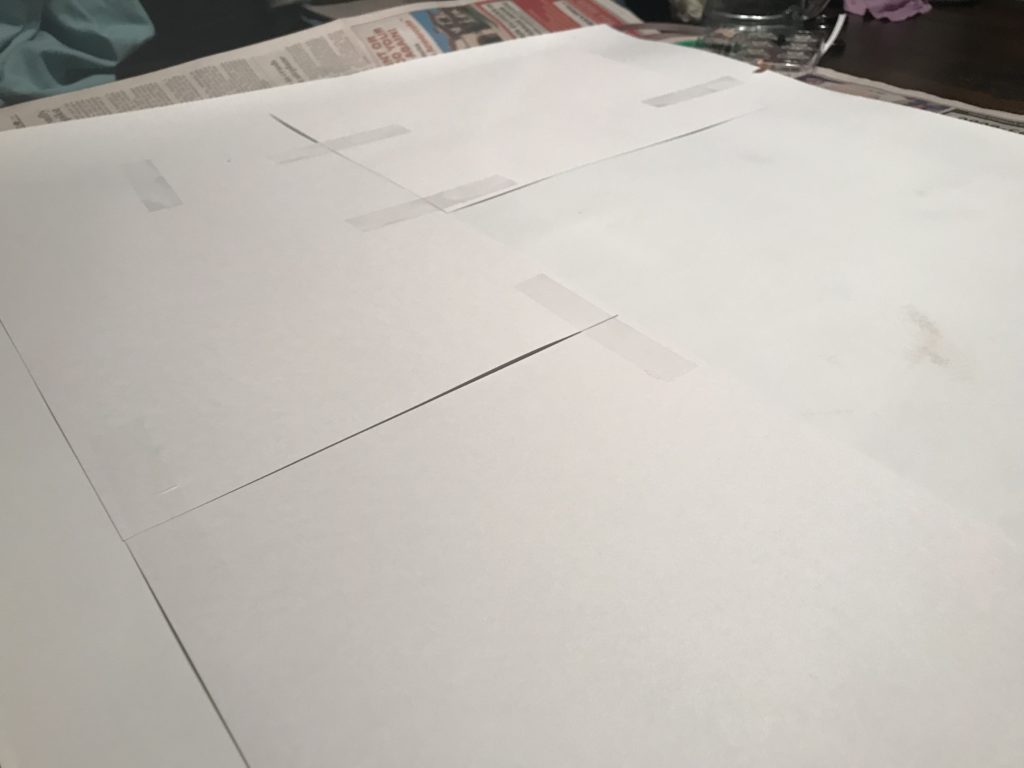
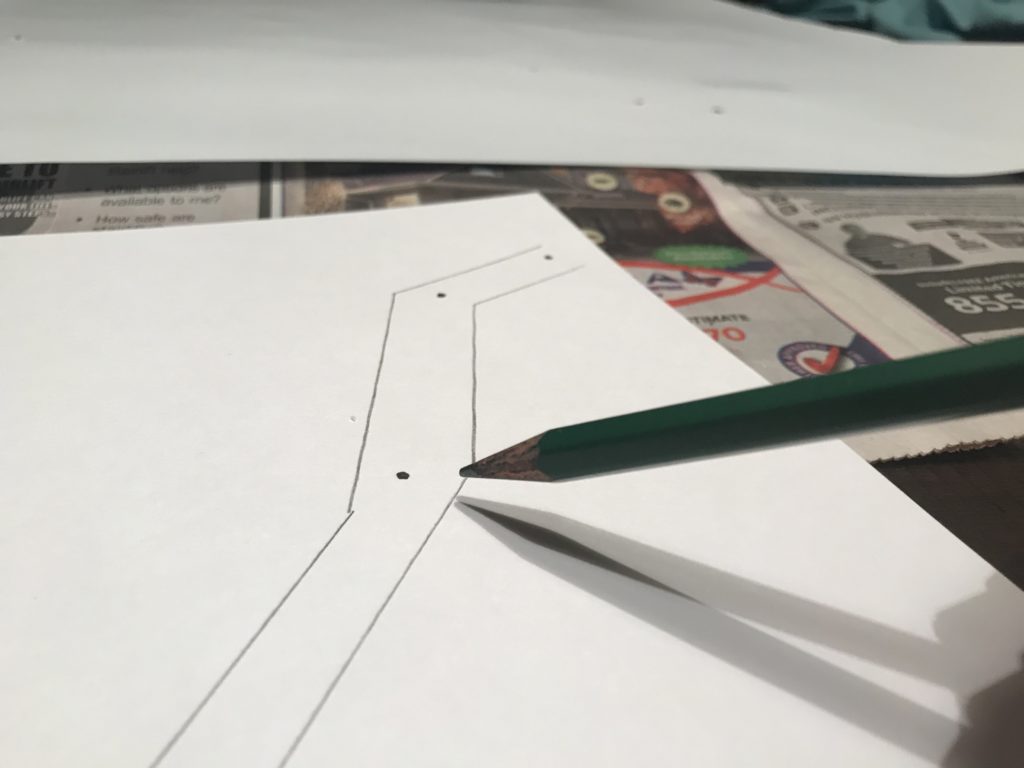
Step 7: Flip the map over again and use a smaller sharpie to make a dot through the hole in the map onto the paper that is taped to the back.
Step 8: Flip the map over again and gently cut the paper free from the map. Be sure to leave the papers themselves taped to each other. This will make it easier to work during the proceeding steps. Only remove it from the back of the map itself. *Pro tip: mark the orientation on the back of the paper relative to the map itself. When we try to put it back, it will help to know which is the top and which is the bottom. We are only going to see copper tape and lights for a while so this orientation will be helpful in the end.
Step 9: After removing the papers taped together, draw out a path that the copper tape will follow with a pencil. No one will ever see this part, so feel free to make mistakes or redraw what doesn’t seem to work.
Step 10: Lay down your first row of copper tape. Make sure that your copper tape is conductive on both the top and the adhesive side. If the copper is not conducive on the adhesive side, you will have weak and unreliable connections each time you overlap the copper tape. *Pro Tip: It is helpful to mark which side of the two lines of tape will be negative or positive. Make sure that the gap between the two lines of copper is not so far apart. The negative and positive sides of the LED Stickers need to make contact with each side of the copper.
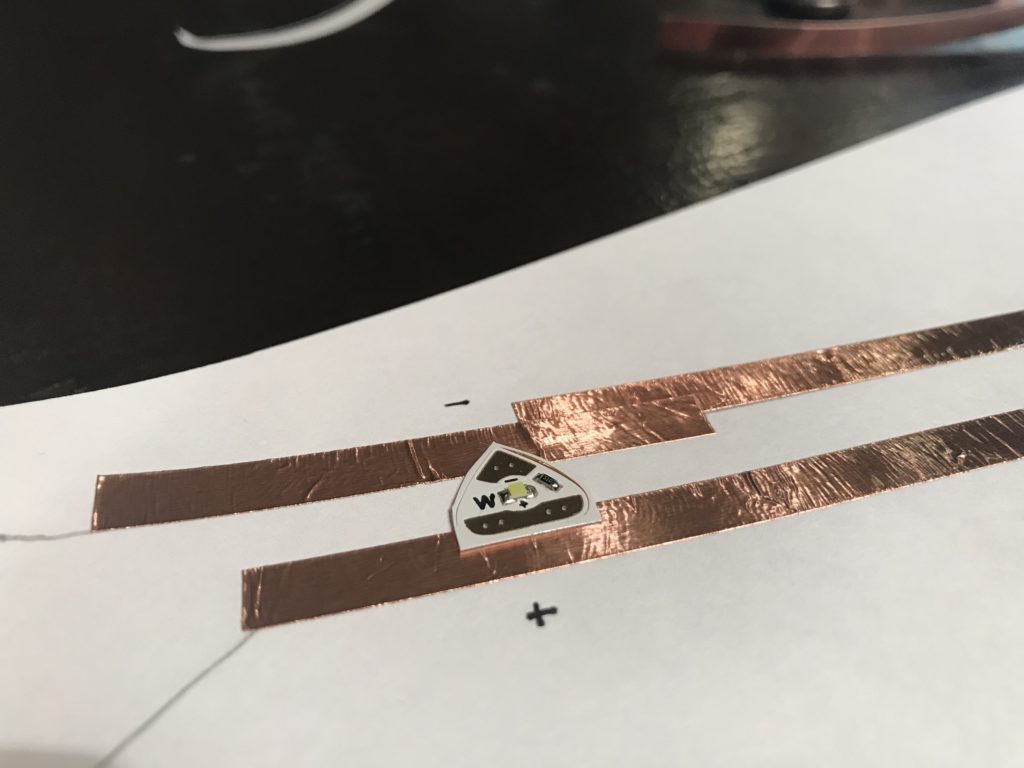
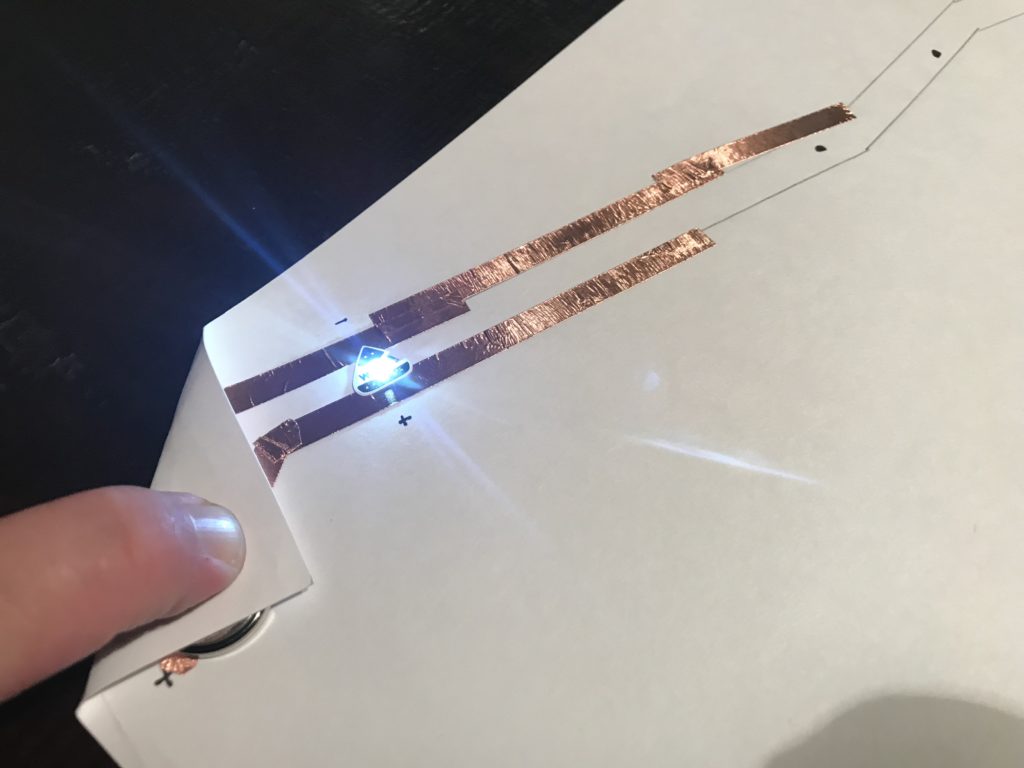
Step 11: Make sure both copper lines spread apart at the edge of the paper where you will have the battery attached. Make sure you use a flat battery. The specific sort is not essential. The one I used is a 3V Lithium 2032. The important point is that the top of the battery is a positive charge and the bottom is a negative. Make sure that the orientation of the battery aligns with the desired positive and negative copper lines, which in turn determines the direction of the LED sticker lights. Make sure the positive is on the positive and the same for the negative. Make sure that the when the paper corner is folded over, the positive is touching the top and the negative is touching the bottom. *Pro Tip: if you are using double adhesive copper tape, make a double-sided tape loop to secure the battery to the bottom copper line. That way, when the top paper corner is pushed down onto the battery, the circuit is completed and will turn on the lights. This can be turned into a button of sorts later.
Step 12: As you build each line, lay down an LED and test for connectivity. This is important because if there is a weak connection, the light will not turn on. When an LED does not turn on, remove the sticker (this will likely damage the sticker beyond repair—I know, I messed-up several times myself) and lay some new copper tape and reconnect the light. Sometimes it requires a little fiddling and finesse to get a finicky connection to be less so.
 Step 13: After the desired lines are created, and the LED lights are in place, be sure to test the entire line. It is critical that the power connection is secure and works well. Otherwise, flickering lights and a poor connection will persist.
Step 14 (Optional): If you used more than one paper across which copper tape cross, use the Conductive Fabric Tape from Chibitronics to make more secure conductive hinges. If the thin copper breaks between these pieces of paper, the proceeding LED lights will not turn on.
Step 15: This is a tricky one, but it is the final step! Align the LED lights on the back of the map such that the light will shine through the previously made holes. When this is secure, you will have completed this rudimentary interactive map!
Possible expansion and application in the classroom:
Again, this project might be expanded into team map projects where different groups of students are working on various trade routes.
It might also be interesting to figure out how to illuminate an entire route rather than just the ports themselves. There might be multiple buttons that illuminate different parts of the trade routes. This would require some other system of lights, but it is an intriguing idea.
This assignment might serve well in a middle or high school classroom, though the trade routes themselves would likely be in the 6th grade Social Science curriculum. How else might this interactive map be applied?
Let me know what you think or how this might be applied in different contexts.
